

Built-In Bunkbeds Part 1
*The following post may contain affiliate links which I earn a small commission from. Thank you!*
I knew I wanted to build some bunk beds the moment we moved into our home and after all the many projects we’ve done I’m SO excited for this one! First off, we live in an old home (like pioneer 1880’s old) so there are lots of quirky characteristic things that we love but one of the toughest is the lack of space or storage.
We have a 4-year-old daughter and a 1 1/2-year-old boy that each have their own rooms but what happens when more kids come along? We also have lots of company pass through our little town and always have to get creative with sleeping arrangements.
That’s why this is such an amazing solution for ANY room to get the most out of your space! We are building bunk beds with the bottom bed having the option to pull out to a king using the IKEA bed. That allows us to have all kinds of sleeping arrangement options!
I chose this bed that pulls out to a king instead of a separate mattress pullout because when our family travels we usually have kids sleep in our bed if we’re in one room so I wanted to make sure it could be accommodating to families/grandparents that come and stay with us. I also like that it has storage drawers as well to keep linens and bedding easily accessible. The slide out is soo smooth and we purchased two 5” twin mattresses off of amazon (it was cheaper than buying the ikea mattresses) and then when the bed is pulled out the mattresses are laid next to one another and I can used twin or king bedding. My parents have stayed with us and they said they really liked it. My Dad is 6’3” and fit on the side that pulls out just fine!
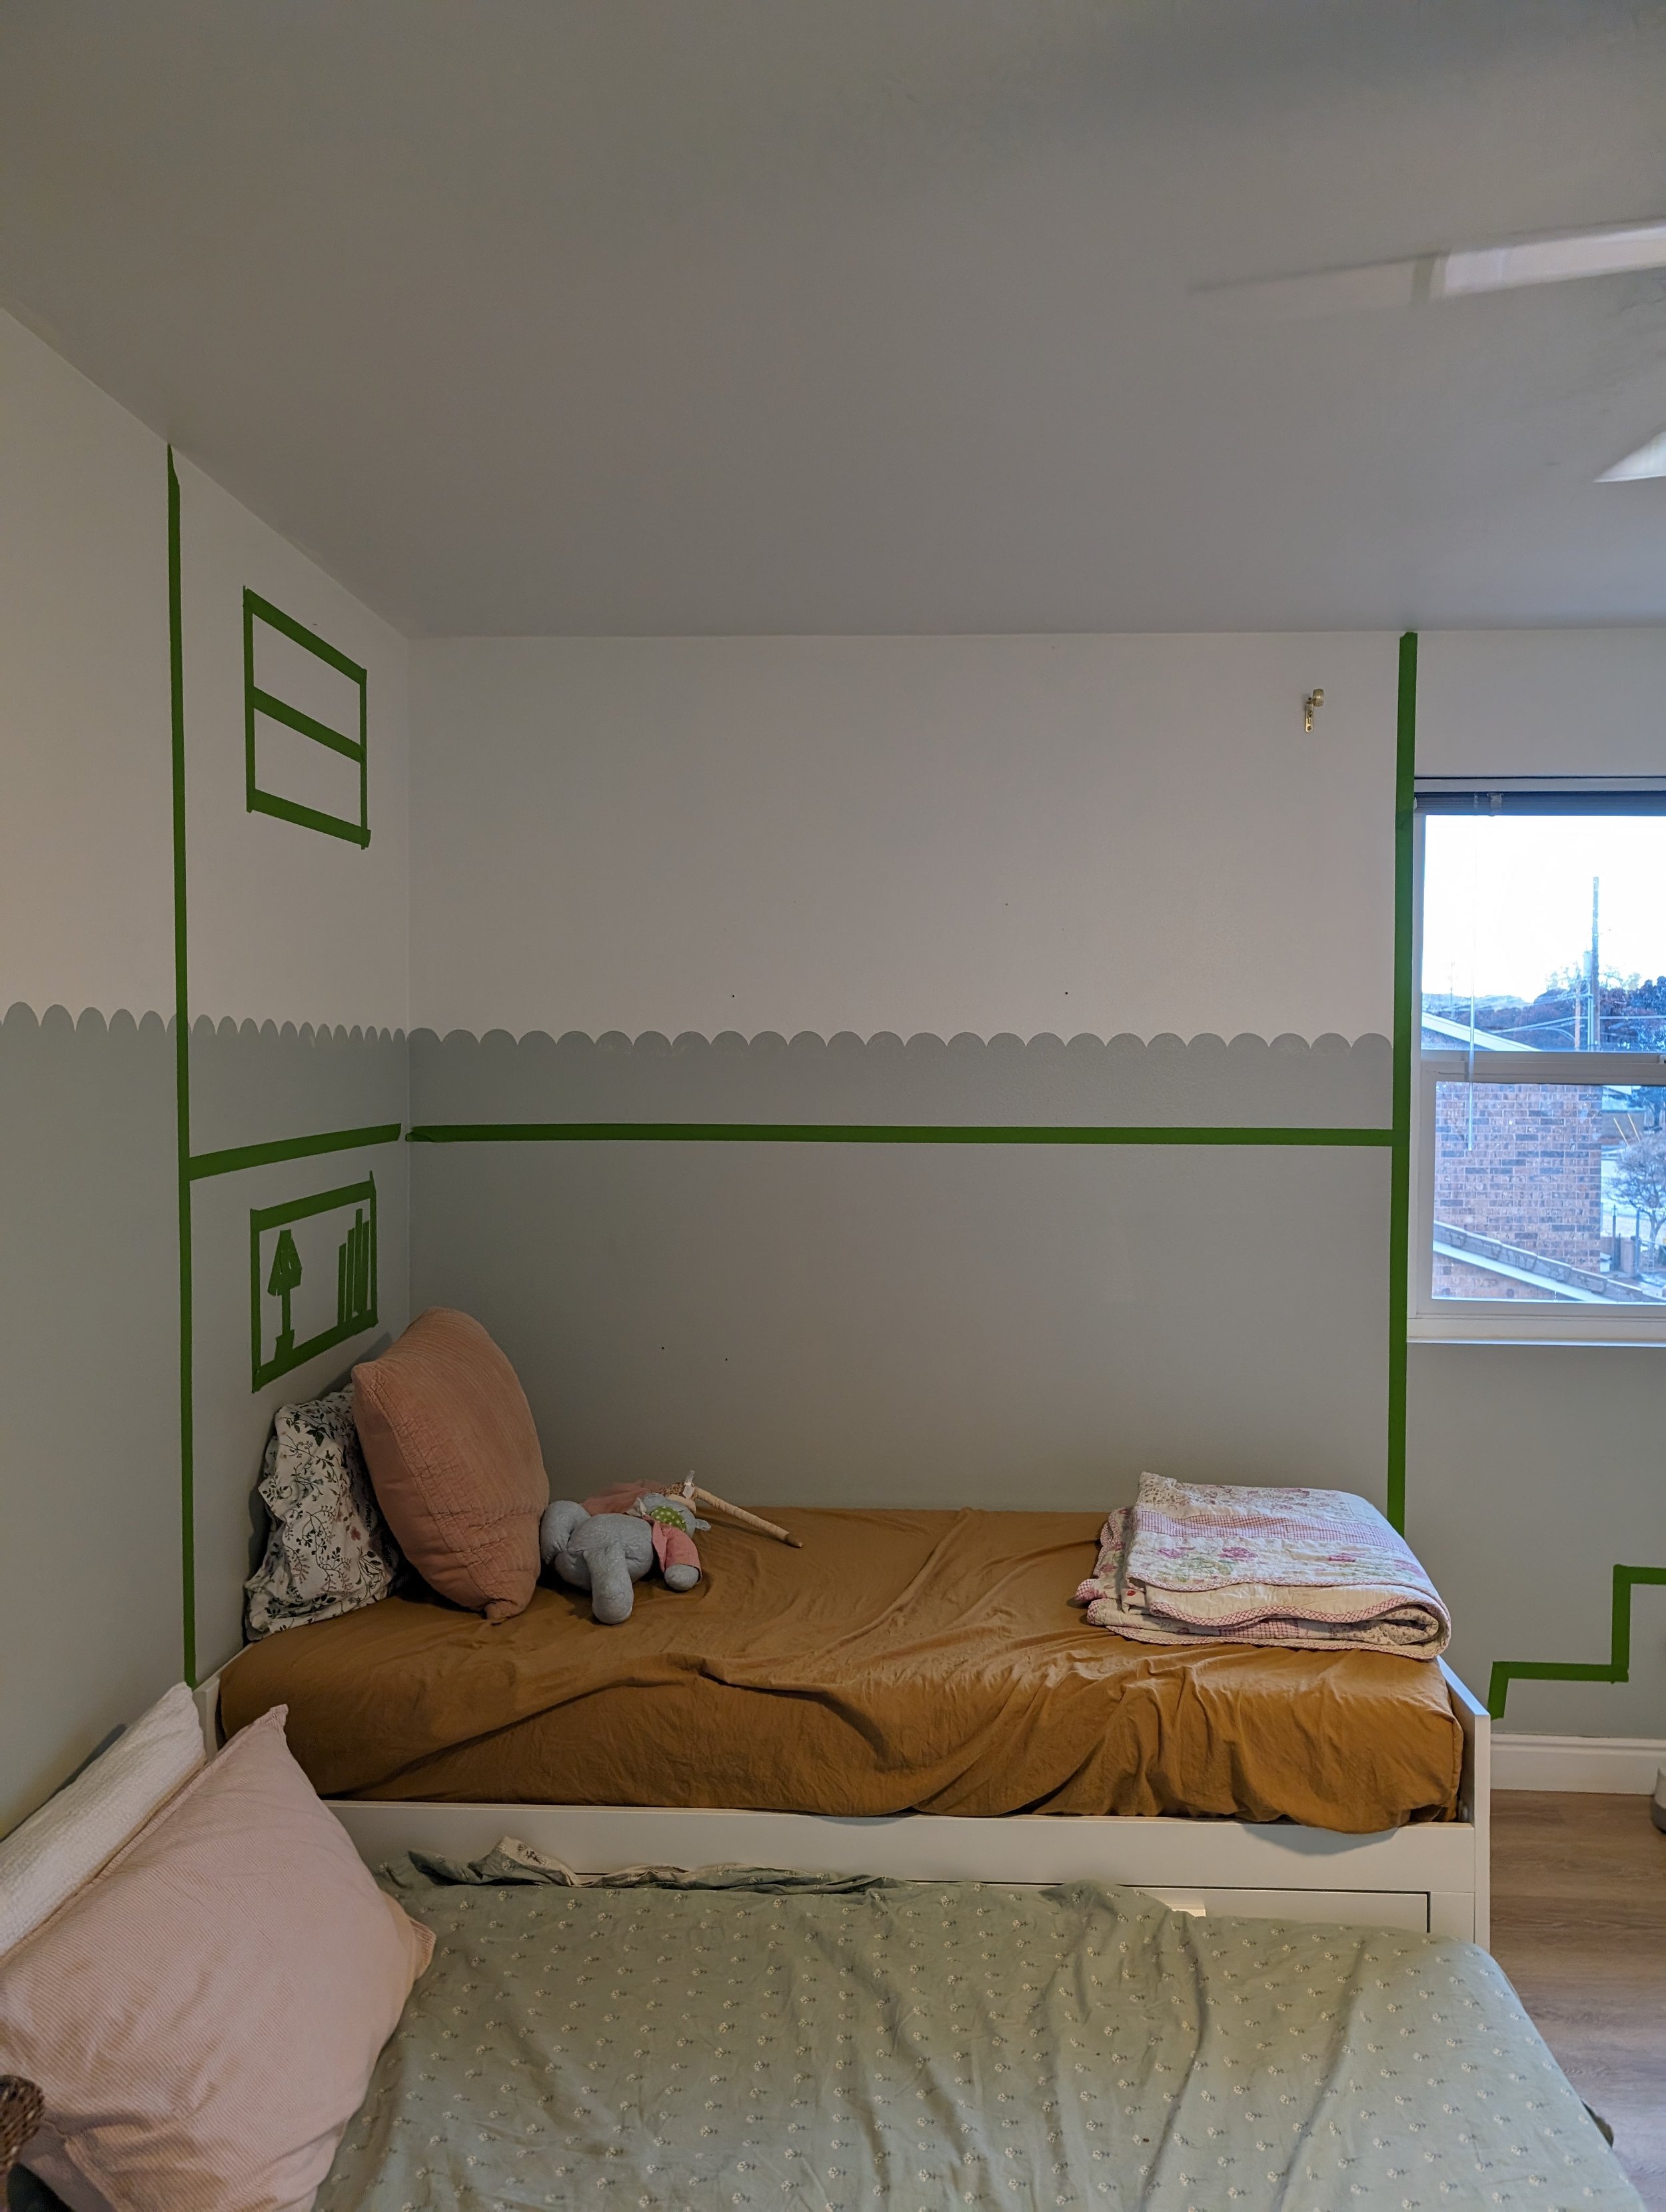
Now when it came to designing the bunk bed I knew I wanted a built-in/vintage look like the examples I so expertly gathered from Pinterest haha The main thing that kept catching my eye was the detailed cut out corners, shiplap, lighting inside the bunks, and fun paint colors.
The best part about building your own bunk bed is how customizable you can make it to truly fit your space!

I outlined our plan out of painter’s tape which is another game changer that I have never tried but now I’m not going back!

We spent a couple hours going over our plan, getting our measurements, and drawing it all out so we’d be on the same page which we’ve never actually done before believe it or not haha
It actually made the world of a difference to draw it all out which might seem like a “duh” moment, but this is the first built-in project we’ve done and it required making our own plans as chaotic as they look.

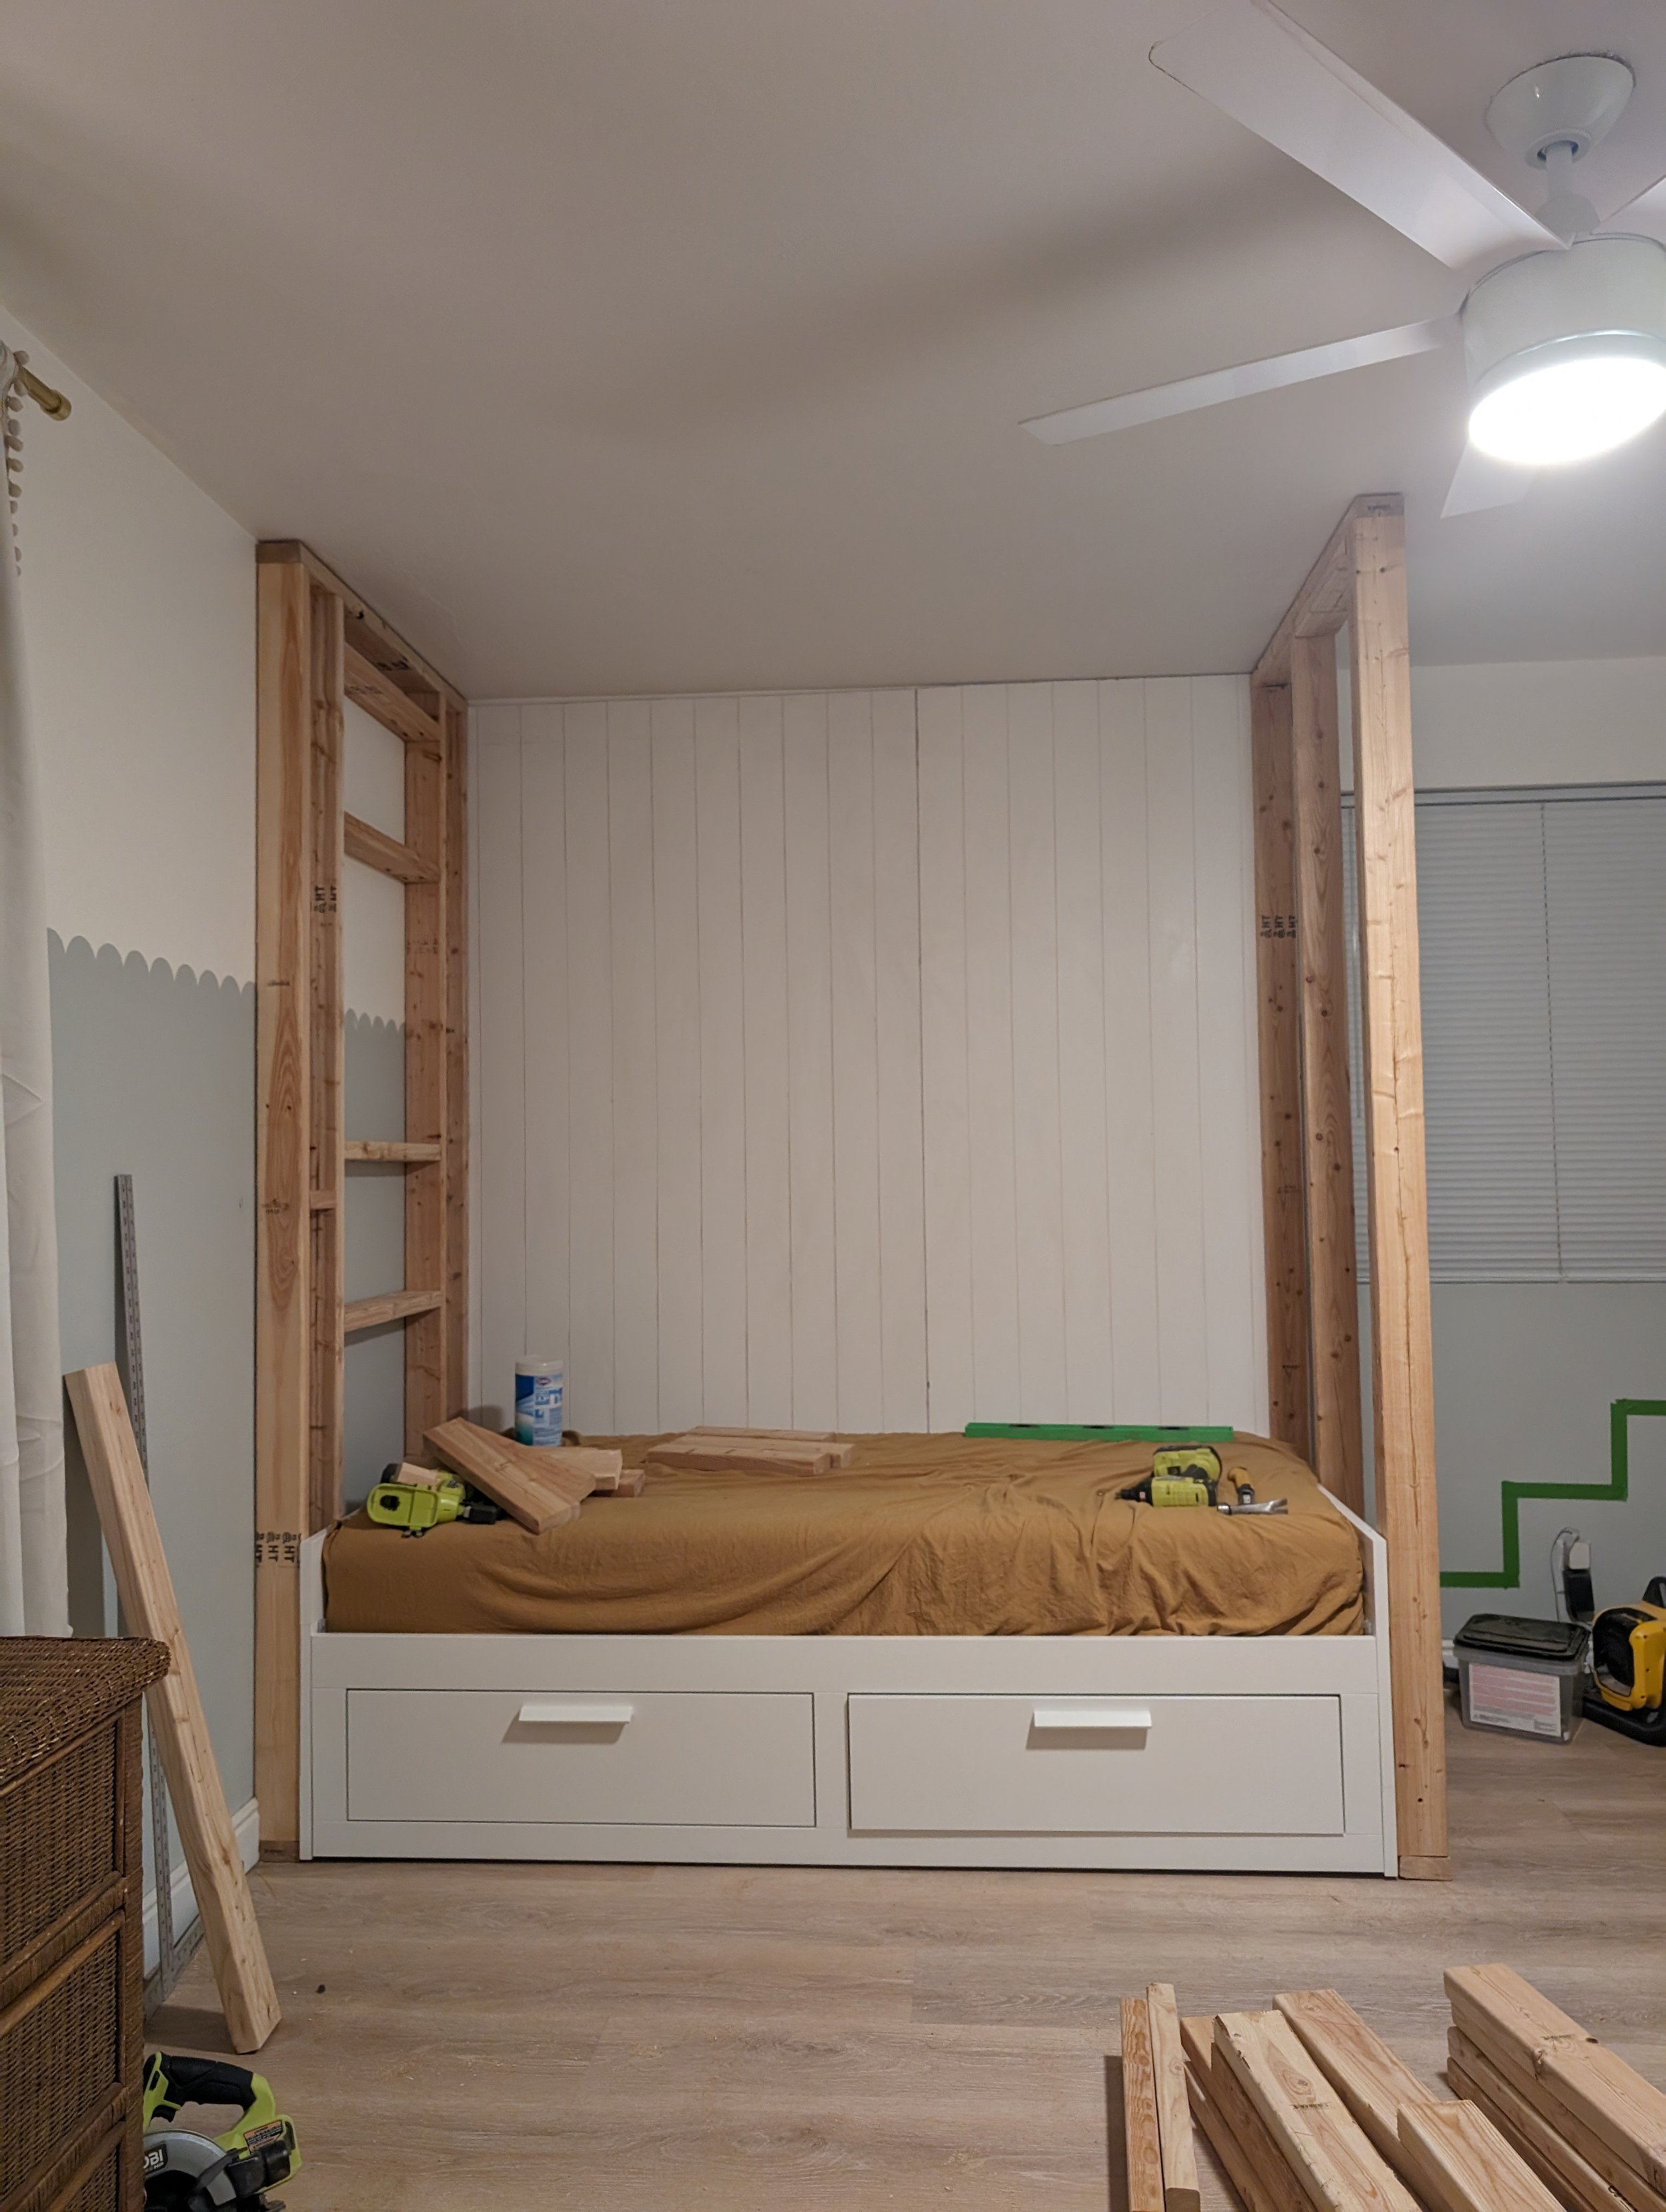
We bought our favorite vertical nickel gap shiplap and used a full and a half panels to cover the wall top to bottom.

Next, it came time to build our first frame that will be against the wall, where the head of the bed is, and is holding the cubbies.

We removed our baseboard just until where the bunkbed will start.
Our ceilings are 95” tall so we built this frame 93” tall x 41” wide. We used our handy wood screws and decided buying a giant tub of them is so nice for big projects like this!


All we did to create that cubby space (or Cove’s ladder as you can see haha) is we attatched 2x4’s around to create the width of our cubby which 24” wide x 12” tall. There’s not much rhyme or reason to it infact, we had creative differences on it and both would have done it differently but quickly realized it just needs to be square, level, and sturdy!

The frame at the end of the bunkbed is the same exact measurements as the one at the head of the bed except this one will be used as the ladder and needed a 2x4 in the middle so we can put the ladder on the left.
Next dallin built the platfrm portion for the bed. He attached the 2x4 along the wall by screwing into every stud and then adding each piece to then add the outer platform piece that runs in-between both frames.

Now we can really start to see the vision and are getting excited! Getting this far took us just over a day!

Now it’s time to make it all pretty in Part TWO!
Are you wanting to make your own bunkeds? Thanks so much for reading!
xoxo,

