

Shiplap Accent Bedroom Wall: Decor DIY For Beginners
Looking to spice up a wall or bedroom? I think shiplap accent walls are the way to go with spicing up a space!
Whether you are going for a modern farmhouse look or cottage feel, you can use shiplap in your living room wall, bedroom wall, or even cover the entire room.
This was such a fun and honestly easy project that I did in a day!
I mean, who doesn't love shiplap walls?
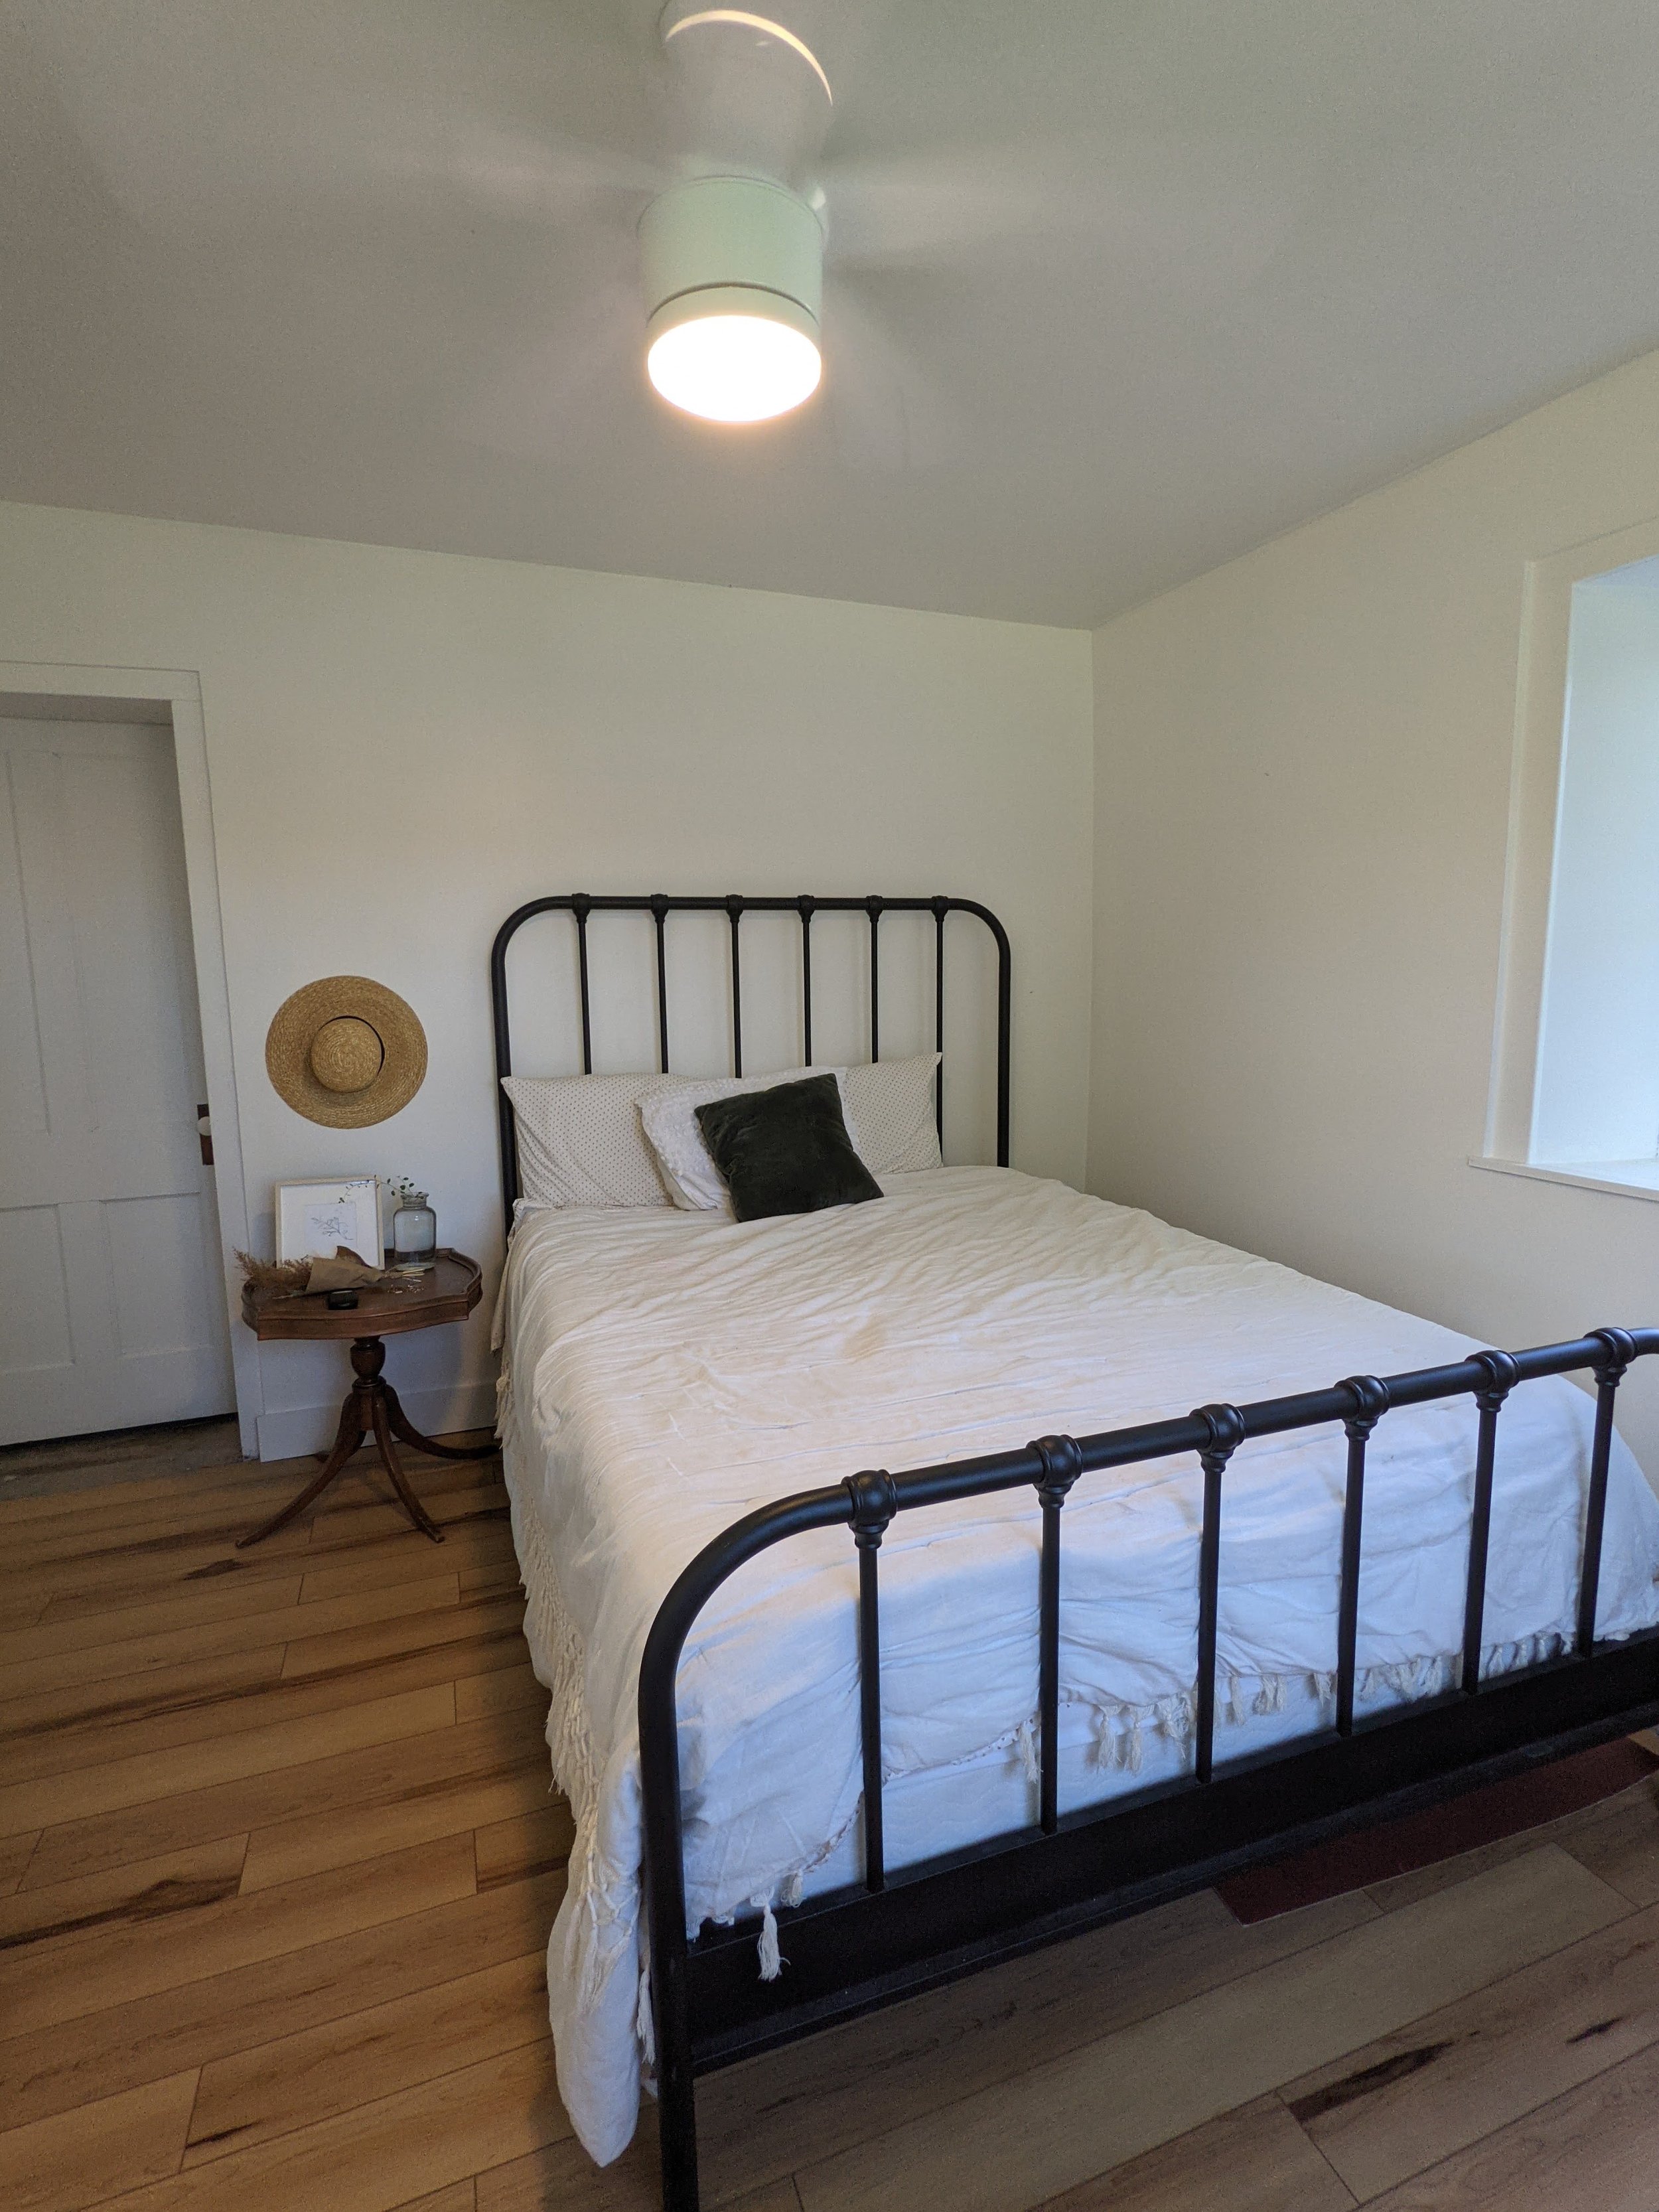
This is our guest bedroom and it needed a make over since we usually have guests come and stay with us every month! St. George is a pass through location so we always have friends and family stopping through but this room has been cold and bare!
What you’ll need:
Tongue and Groove Wood - I got mine for $50 off of Facebook Marketplace
Tape measure
Level
Pencil
Interior Paint color “Backwoods” by Benjamin Moore $35
Roller
Paint Brush
Trim Piece $12
TOTAL: $97
Shiplap Wall: Tongue & Groove Wood
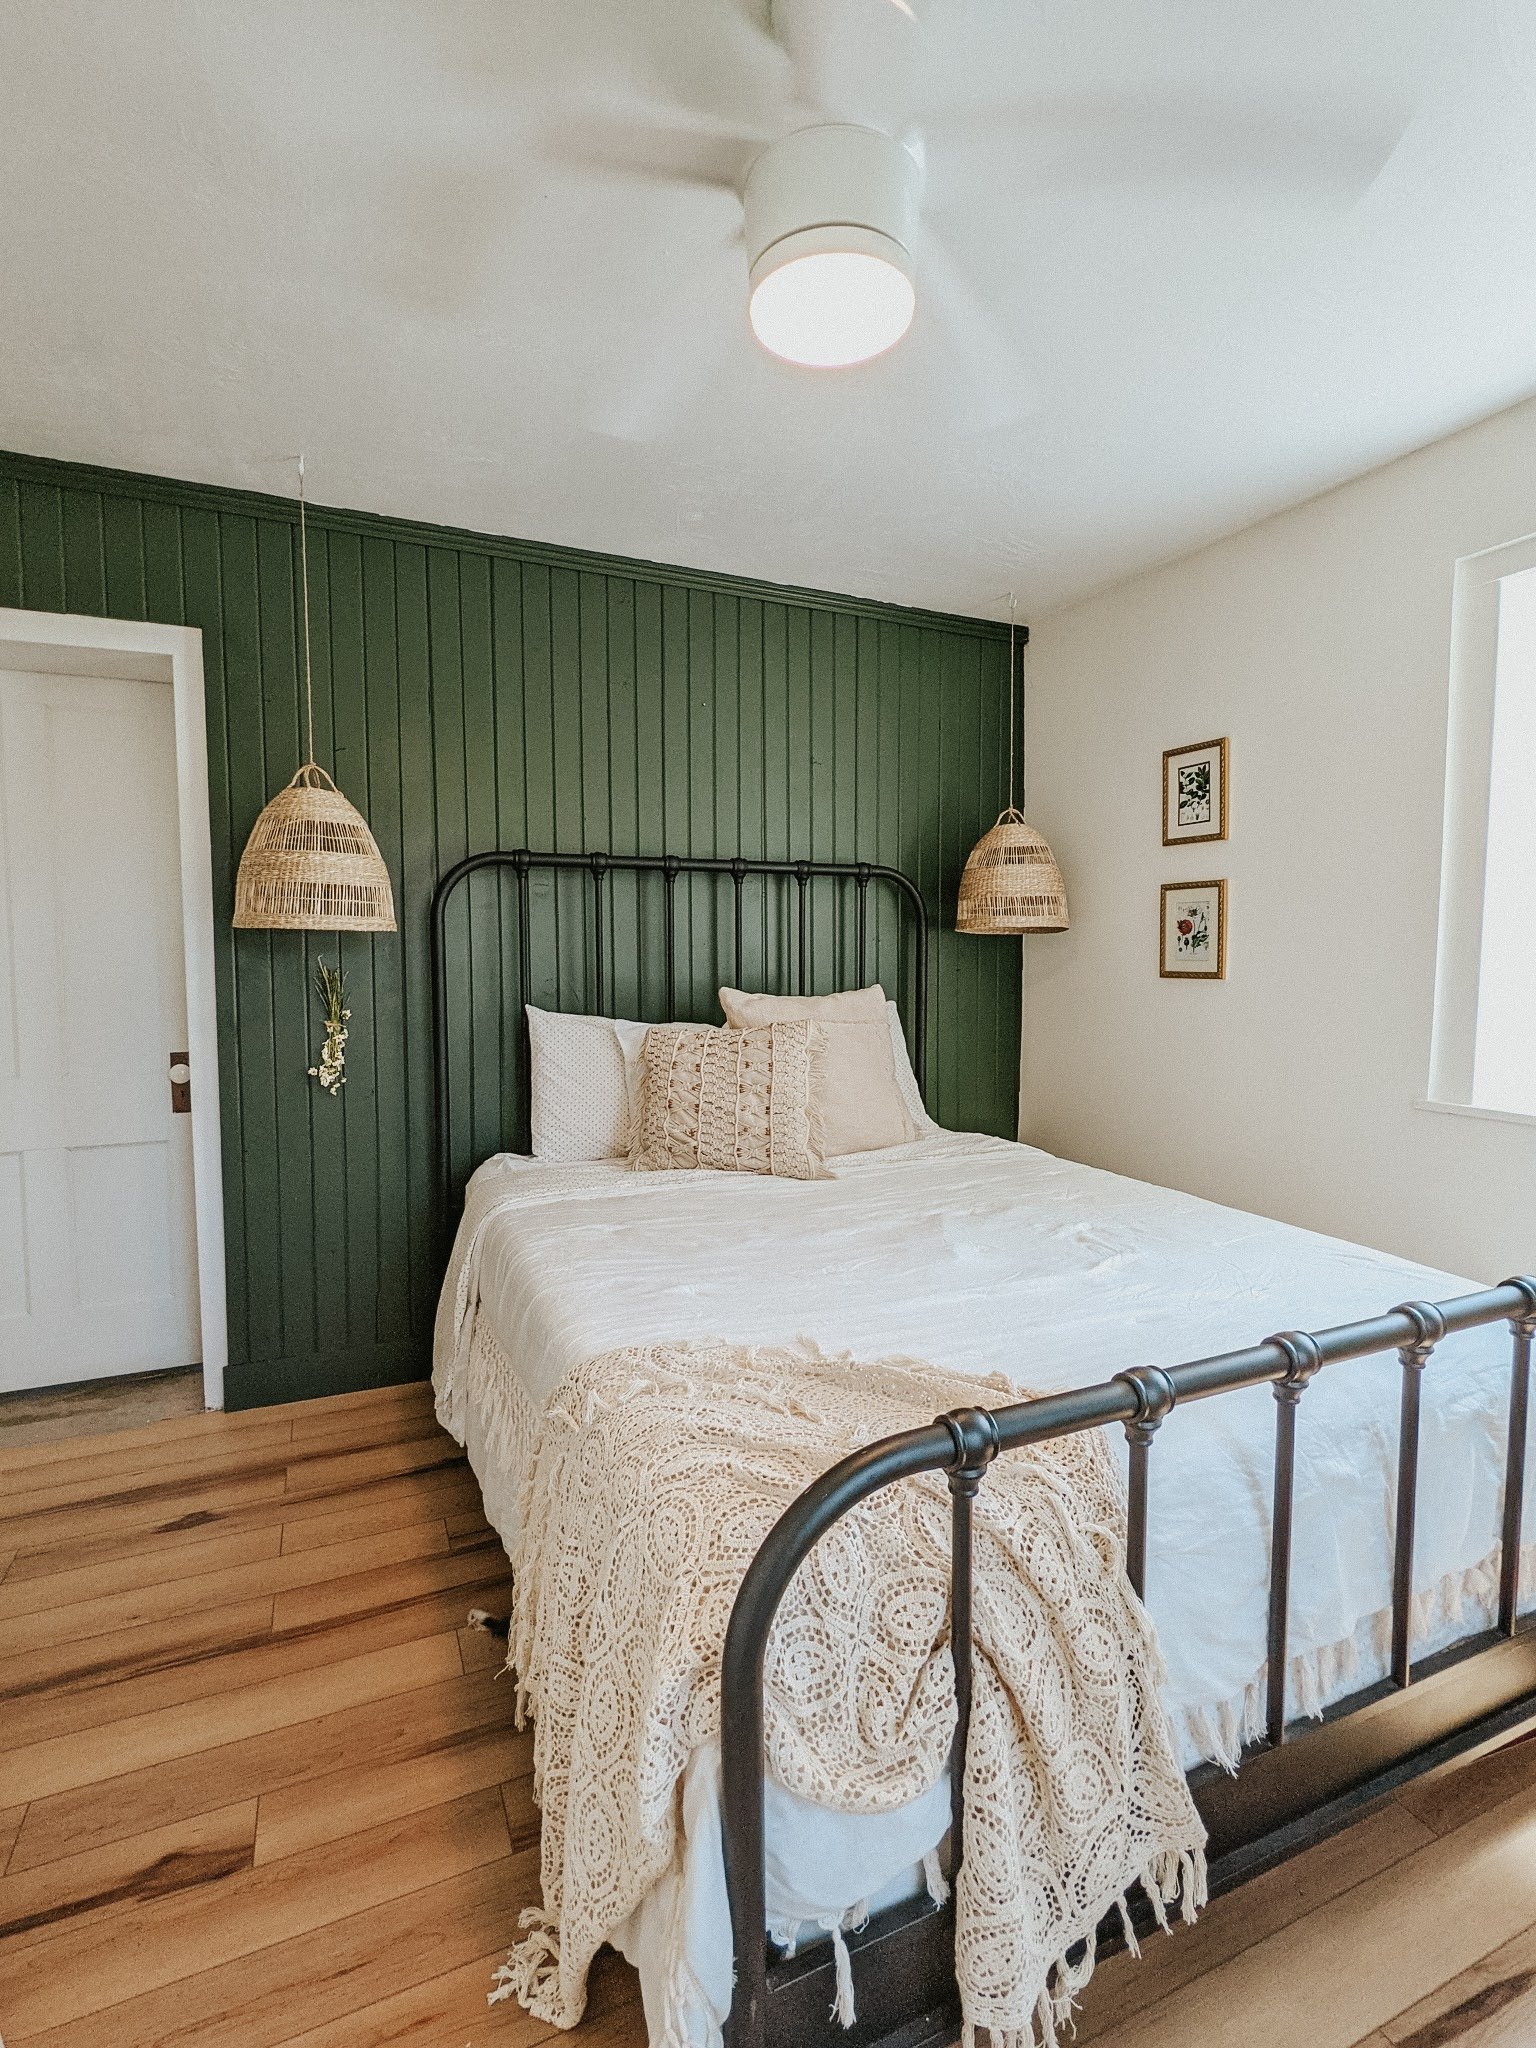
I wanted to do a bold color since I don’t see this room every day and could do something a bit different and fun!
What really sparked this project was finding all of the wood on Facebook marketplace for $50, and with wood being so expensive right now I just couldn’t pass it up!

Picking up the Tongue and Groove wood for shiplap accent wall.
Let me show you from a different angle how far this wood overhangs and how terrifying it was driving home….
Some pieces of wood were 12 ft long and our truck bed is 5ft long.
That's a 7-foot overhang!
I’m sure everyone on the road stopped and stared at what I sight I was just crossing my fingers and toes I wouldn’t get pulled over haha

Tongue and groove wood sticking out of our truck
Shiplap Accent Wall Install
This wood is tongue and groove and has two different sides you can use!
There is a wide side that looks like your traditional shiplap and then the other side has more of a bead board look with a thinner wood look and that’s the side I chose!
I measured my first board, trimmed it, put it up, and realized how incredibly crooked our bedroom wall is haha Nothing we can’t hide with a bit of paint, right??

First piece of tongue and groove wood for shiplap wall

Cutting the wood with my miter saw
You can see at the top of the wall that not all the cuts are perfect which is fine because there will be a trim piece covering it!
Some pieces took a little bit of maneuvering and tapping with a hammer to get into place but then just used the nail gun to secure them to the wall!

The shiplap accent wall almost complete!
I had to wait for Dallin to get home to help me cut the piece around the door frame since this was still beginner-level for me using the miter saw!
Also, I think with every project I do I panic at some point that it might not turn out well and this was probably around that point haha

Entire wall is covered with shiplap!
Cutting Tongue & Groove Wood
Cutting this piece that will run along the door and then above it with our jigsaw to get that tight corner!
We have used this jigsaw from Ryobi on multiple projects and it seems to work just fine.

Dallin cutting wood for the doorframe on the wall

Ryobi jigsaw cutting wood for our shiplap accent wall.

I guess I didn’t take any pictures of me painting but it took me a quick 30 minutes to paint this wall and only had to go back over a few spots since the paint covered well!

The green-painted shiplap was a bit more daring for me instead of going with something like white shiplap, but I'm so glad I went with this color.

Finished shiplap accent wall in our guest bedroom.
I plan to do wallpaper in here to compliment the green bedroom wall and add a lot more to this room but the accent wall itself was quick, easy, and totally a great project for beginners!
I love how it ties the room together and became a focal point for our guests that stay with us!
What do you think about bedroom shiplap?
Thanks for reading!
xoxo
