

Wall Stud Storage Cabinet DIY
If you are in need of more storage like we are then this in-the-wall storage cabinet is the easiest project even for beginners! Our bathroom upstairs is shared by us and both kids which means…where do we put all of our products? I literally have to keep all of my hair products in my nightstand, our medicines are under the sink in our bathroom with a child lock, and I’ve kept my makeup in a traveling bag that Cove gets into.
Needless to say, we are in desperate need of something creative to allow us to put our products somewhere! Cue consulting Pinterest and gathering ideas! There were a few tutorials but not that many to go off of so let’s make our own!
So here’s our wall and my idea at first was to put a door behind the bathroom door that will mostly be hidden, but then I realized we needed all the storage we could get so what if we centered to cabinet on the wall but doubled it in size a.k.a. using space in-between two studs?

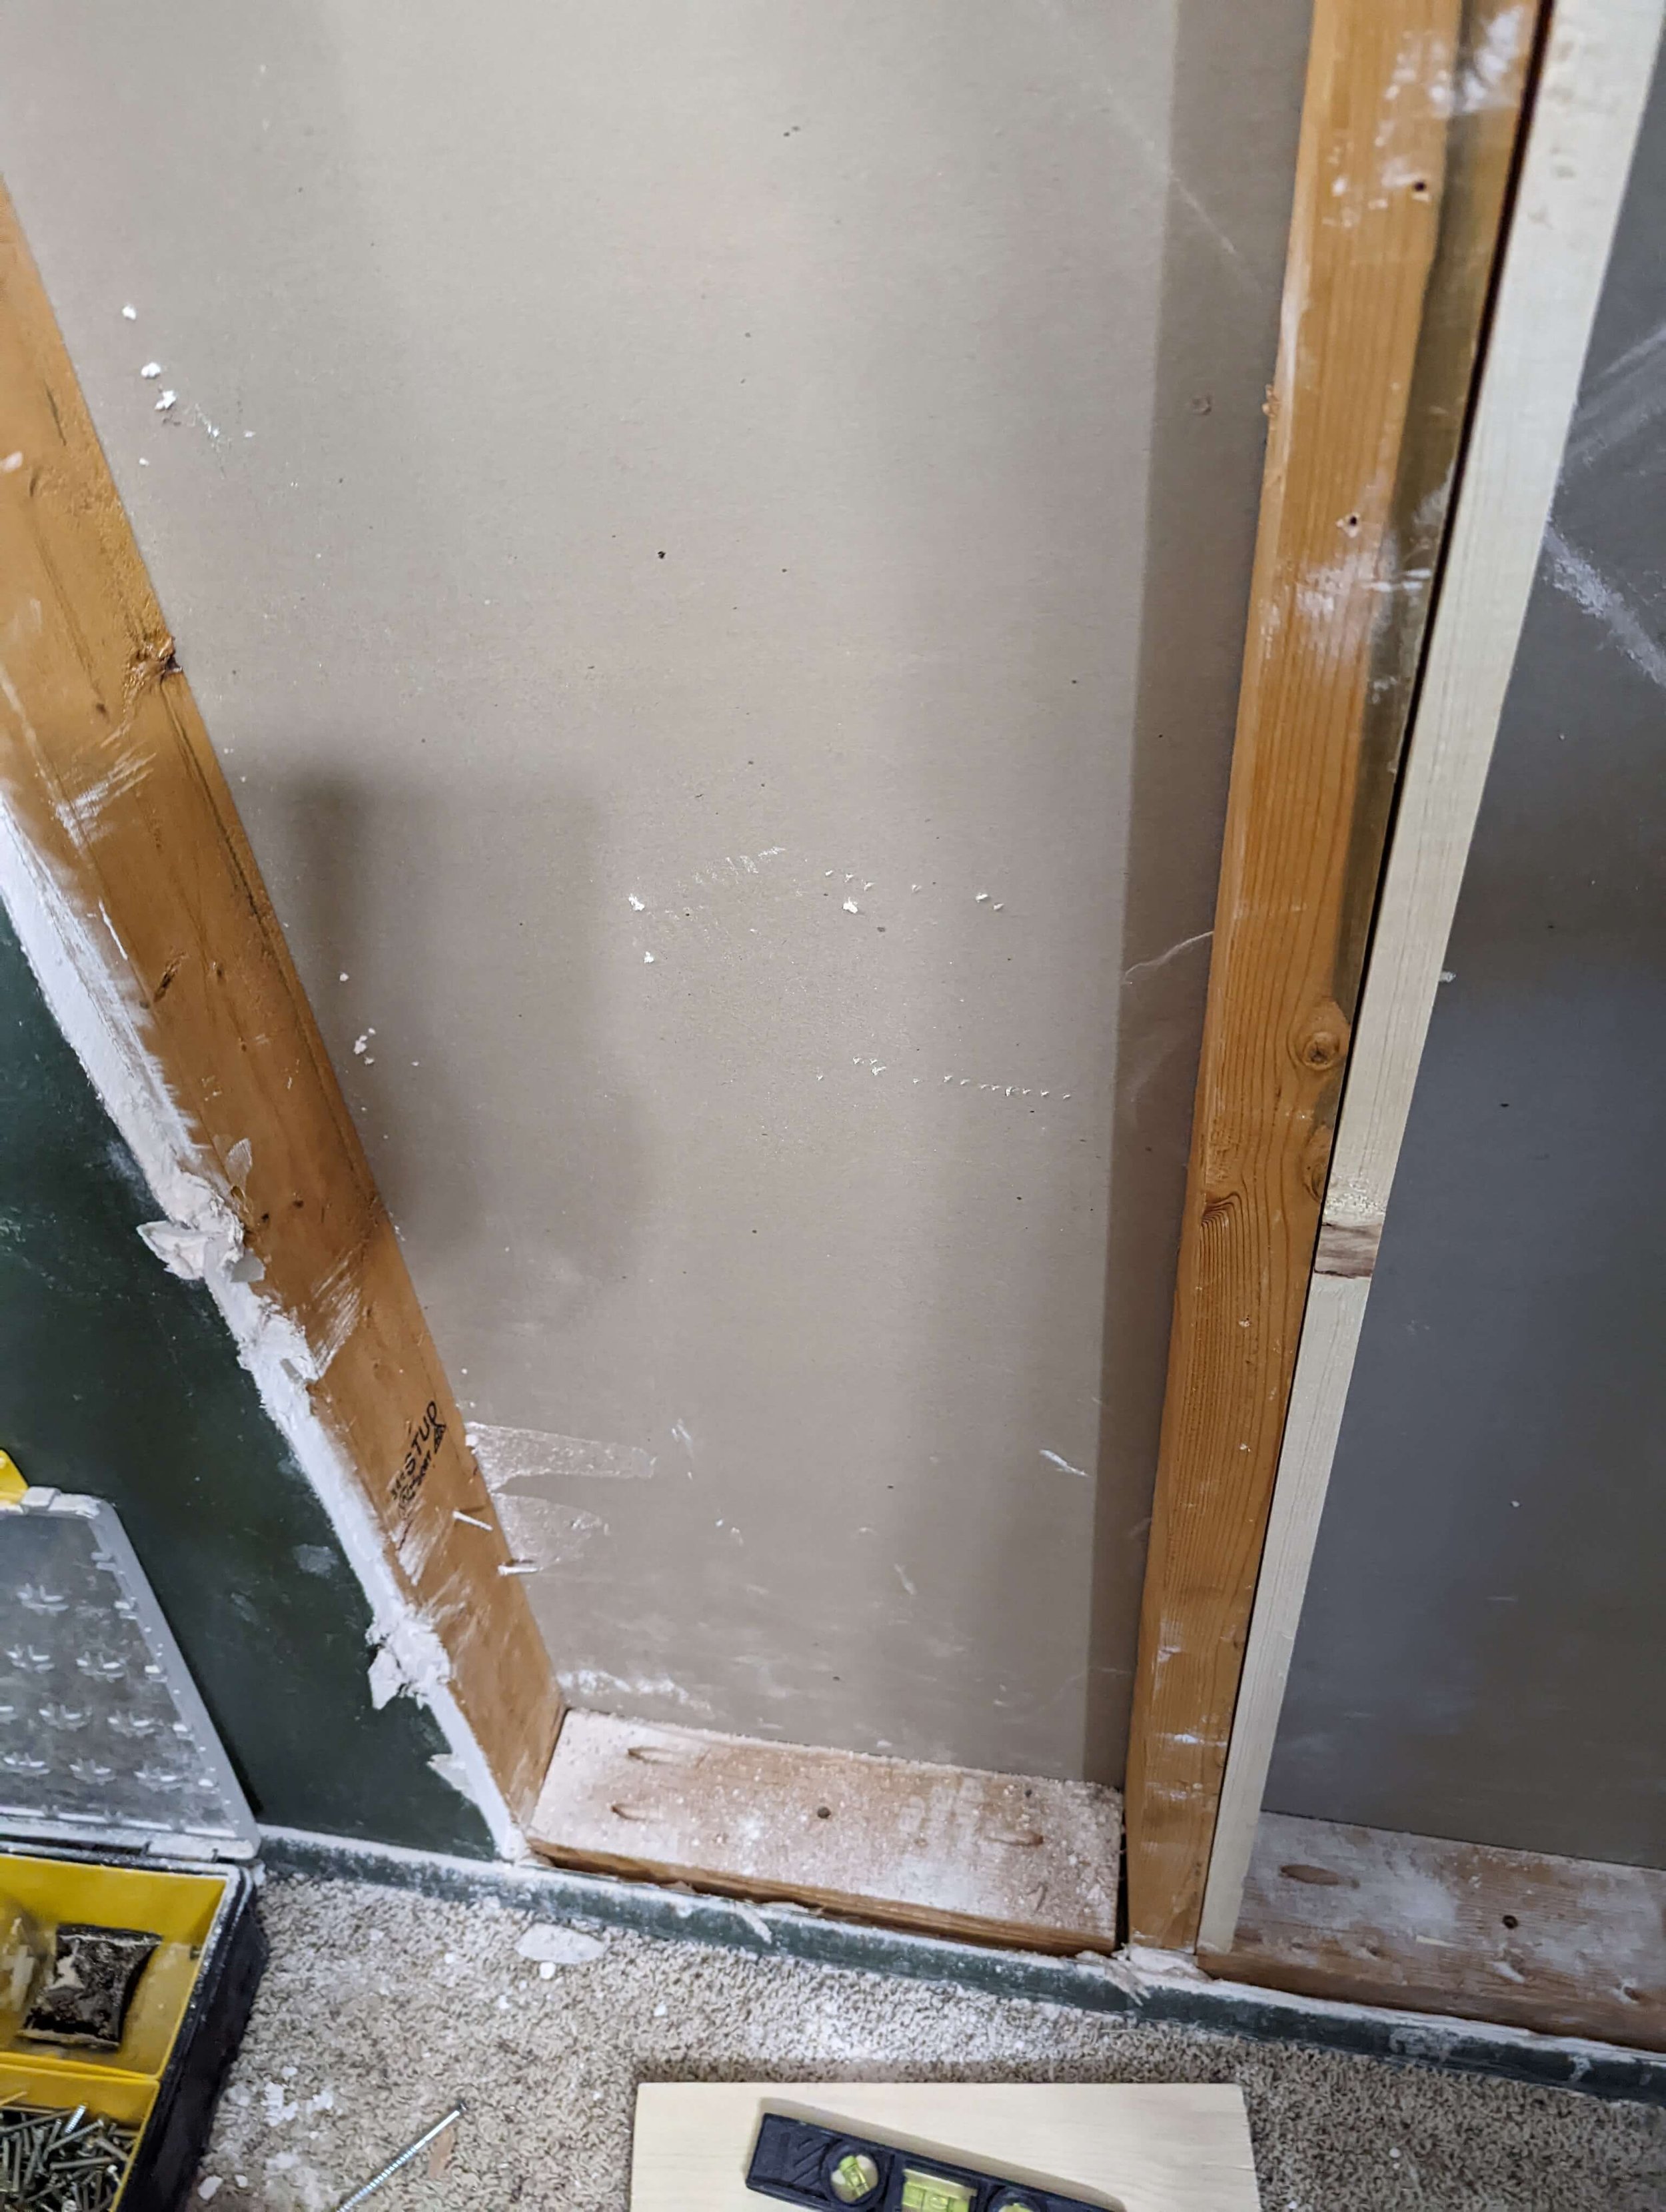
So we used the stud finder to locate the studs and then cut some holes in the wall using our reciprocating saw to make sure there weren’t any wires around before diving into it.

Well the good news is there’s no wires but we have a much weirder problem…What the heck are these diagonal pieces of wood? We asked all the older and wiser men we know (a.k.a. our parents haha) and no one knew what it was and had never seen it before!


We’re guessing the diagonal pieces were for more support so Dallin just went ahead and removed the diagonal pieces and reinforced support with a 2x4 piece of wood along the bottom and along the top on each side.
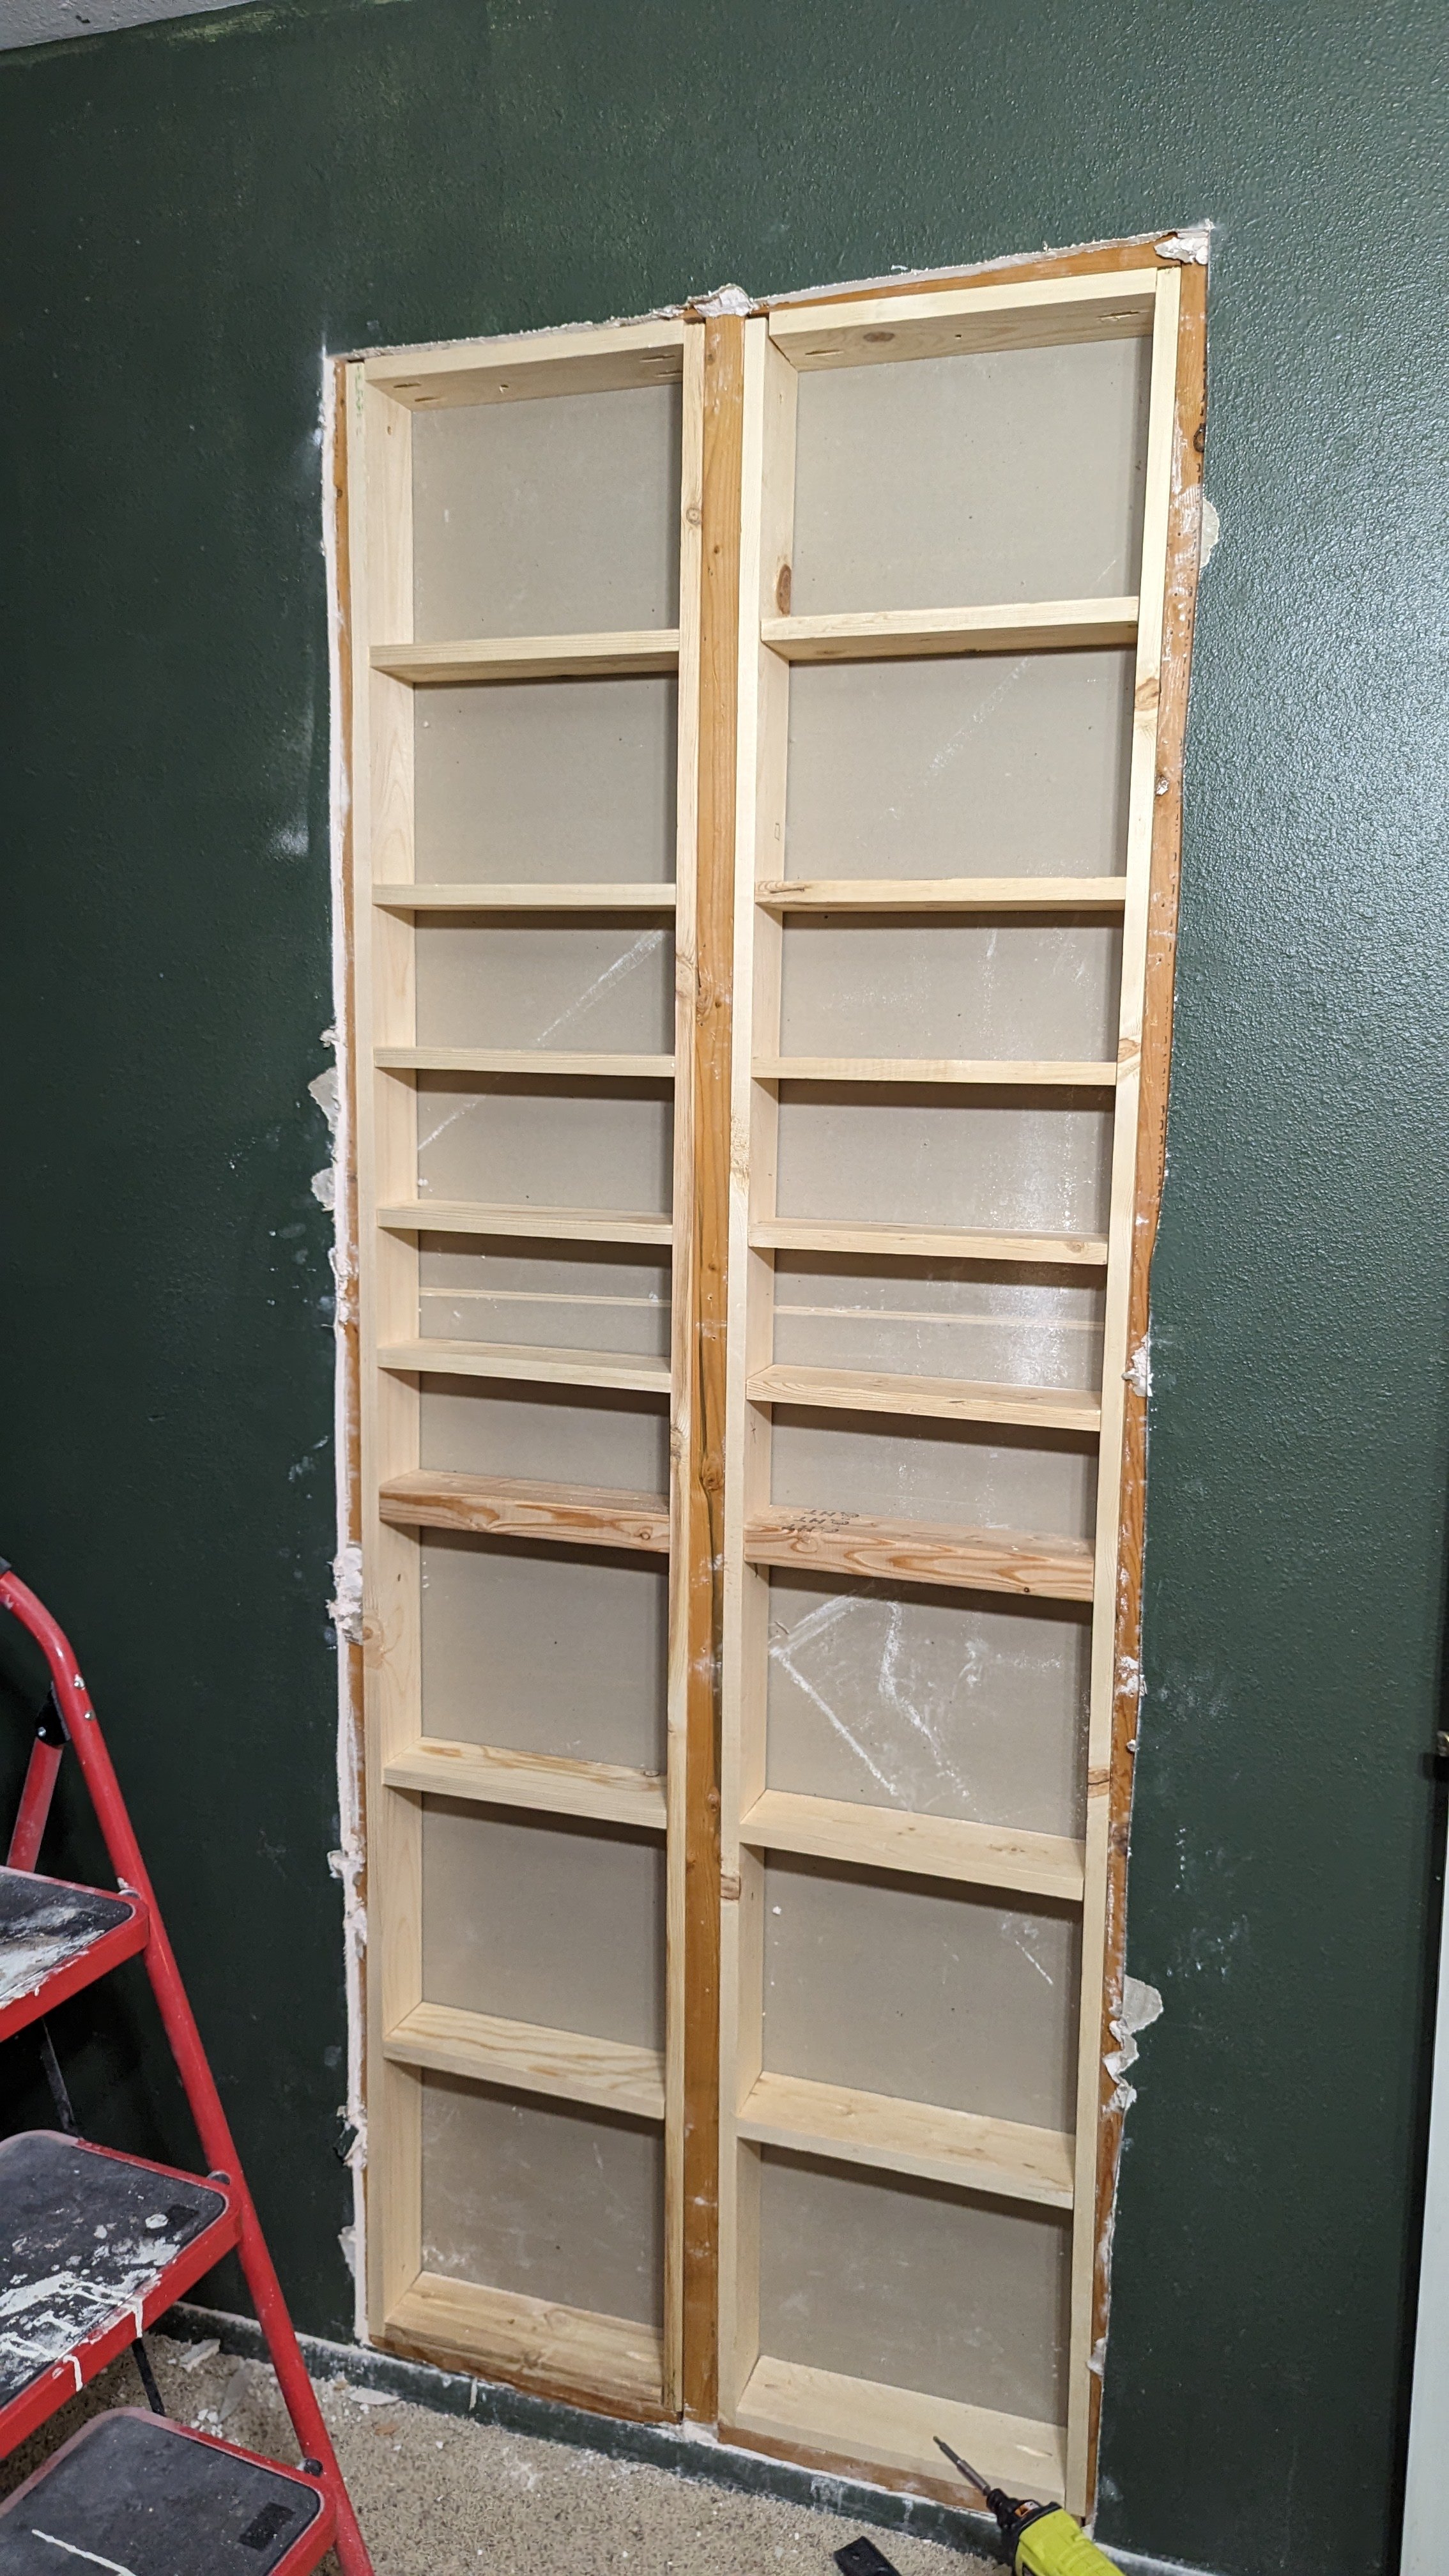
Now that the weird diagonal pieces are removed, we’ve reinforced supports, we added 1x4’s going vertically to create more of a frame to work with.


Next, we measured the width and cut 1x4 pieces to be our shelves. We finally got this awesome jig that makes pocket holes! It’s seriously such a game changer I don’t know why it took us so long to get one.
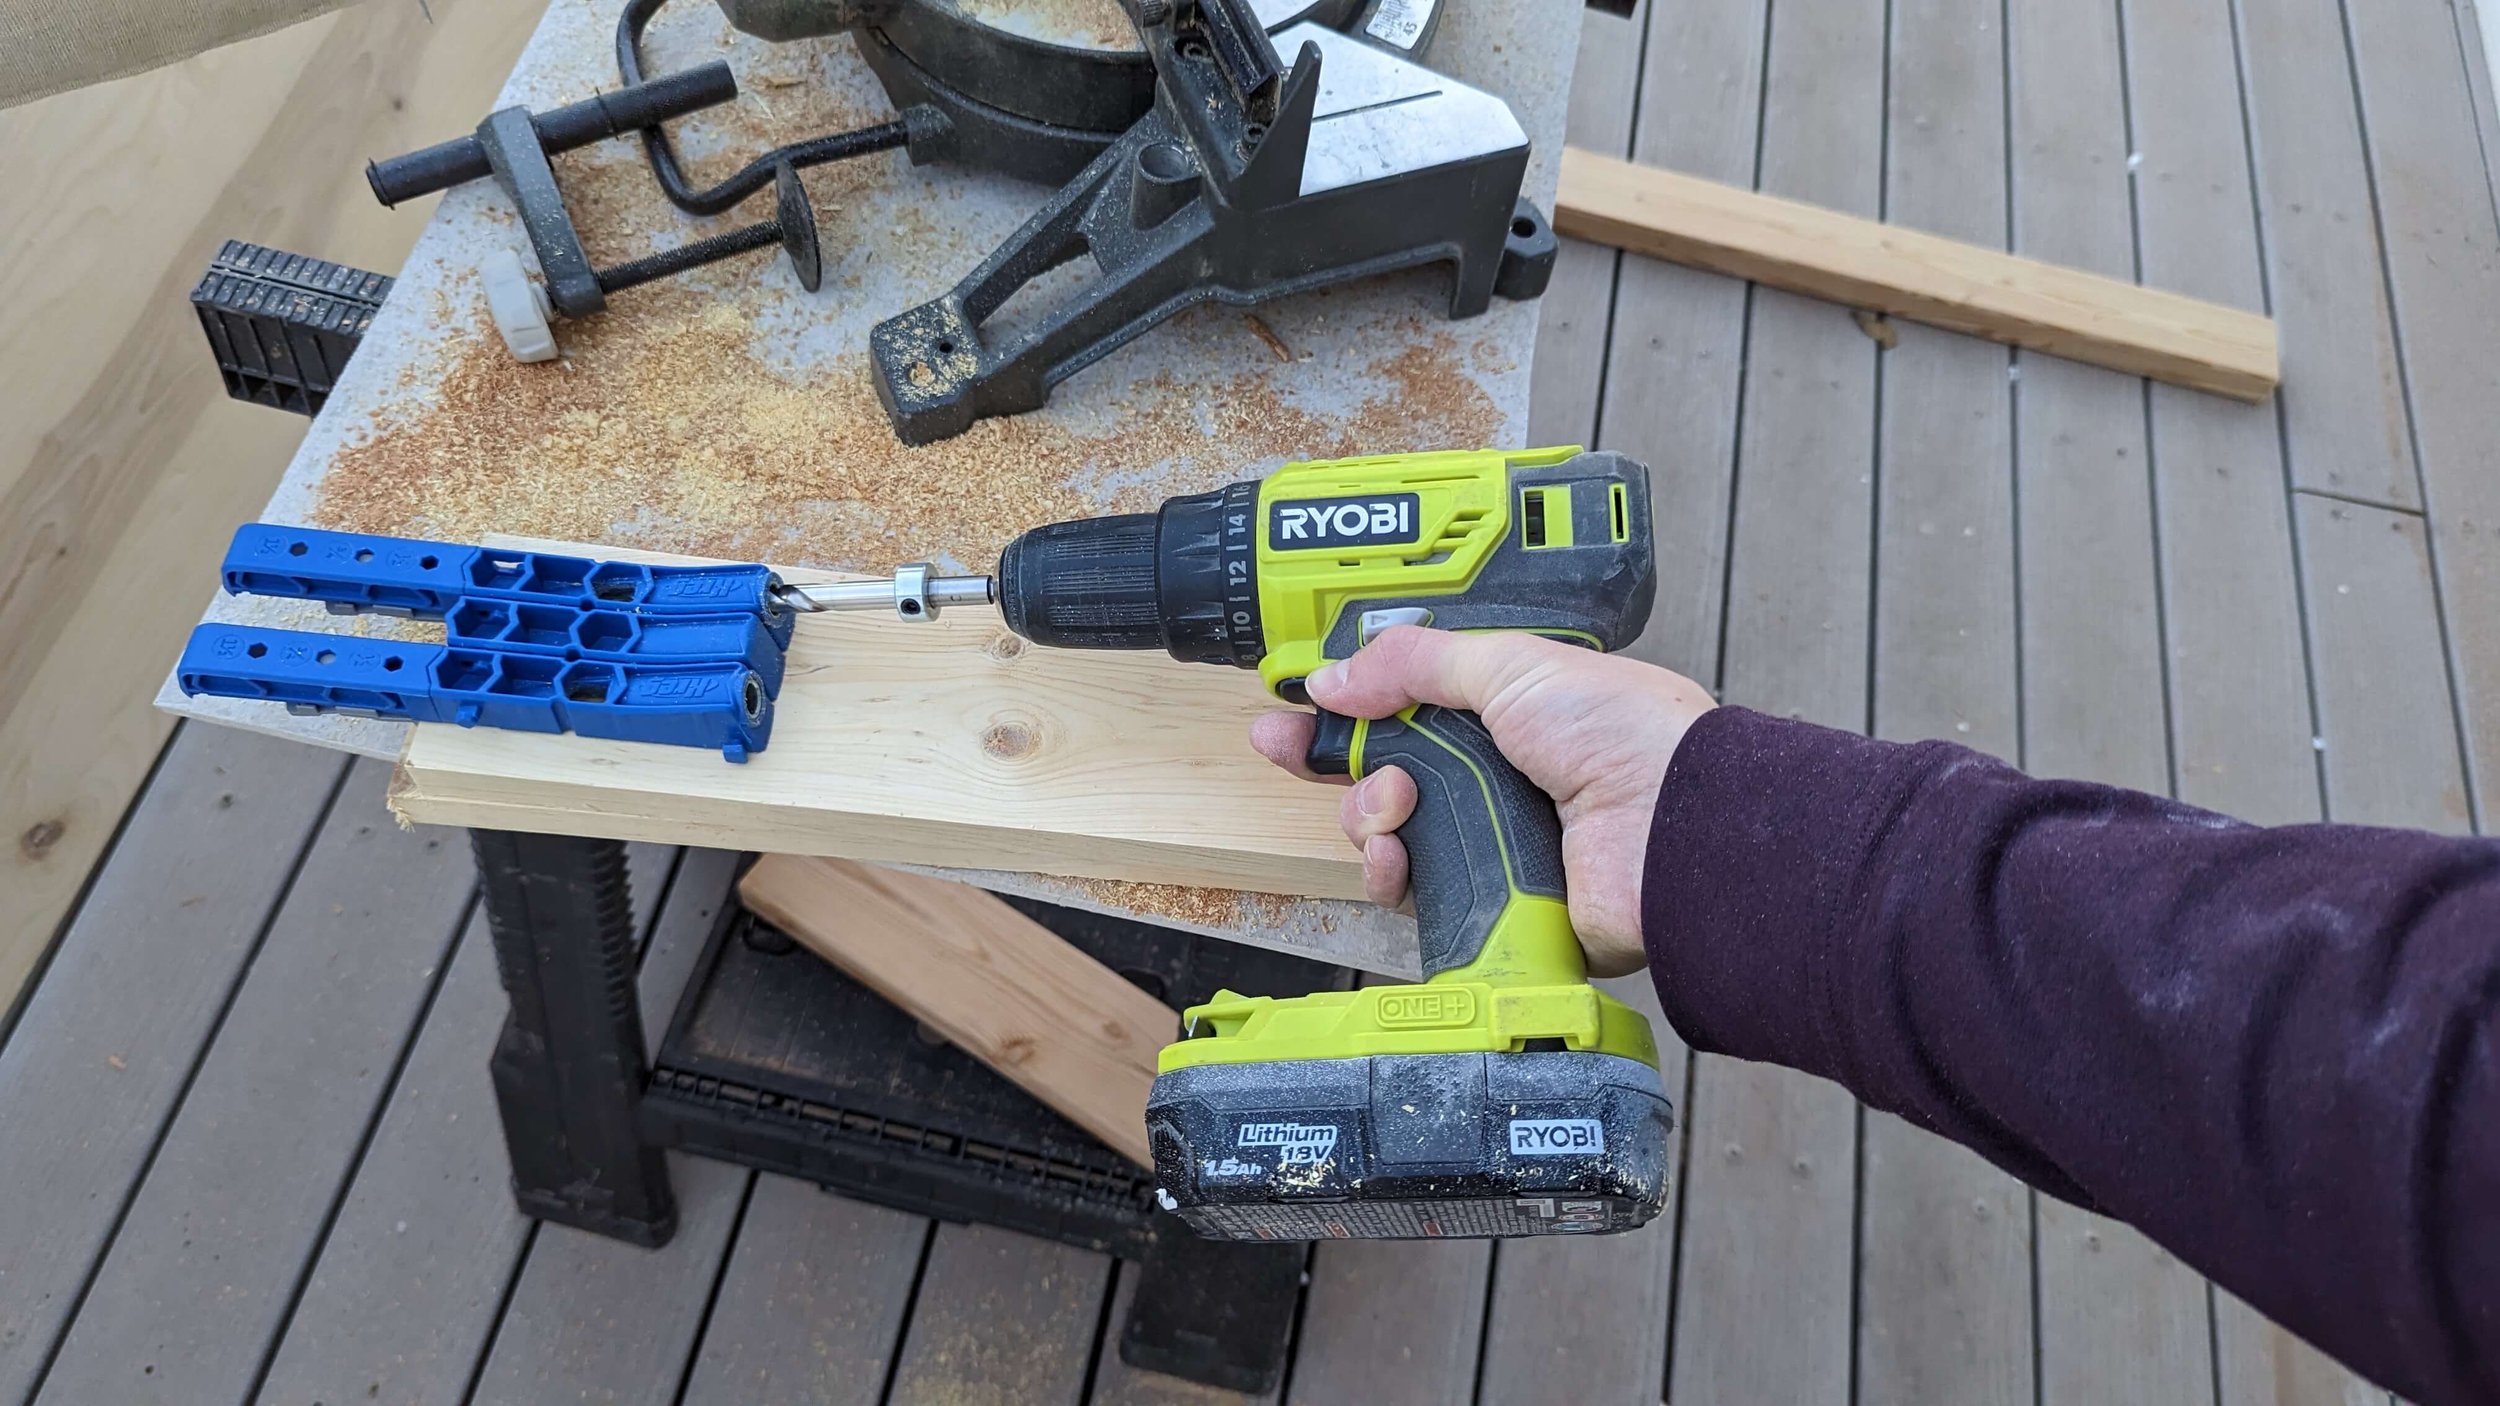
Drilling these pockets holes are super easy and make it so we could install the shelves and if we want to move them around it’s just a couple of wood screws.

I decided the spacing/height of the shelves by grabbing different bottles and products to make sure my tallest hairspray would fit and then measured smaller shelves for our medicines and such.
Dallin leveled and installed the shelves on the right side and then mirrored it and lined it up on the left side to match.


Next up, making the cabinet doors! Boy oh boy is wood so expensive right now. We didn’t want this project to be very expensive but we also didn’t want to cheap out on the doors since we’ll be looking at them every day. I saw an example of a couple closets and they had the top doors slightly taller/longer than the bottom ones. We chose a panel of wood to cut up that was 1/2” thick.

Dallin cut the four doors and used our handy rouder tool to make the holes for the soft close hinges we chose. The hinges were a little more pricey but I knew we’d be happy we did these since the head of our bed is right on the other side of the wall and we’d be jolted awake by slamming cabinets. Plus, it’s just a little more classy.

Installing the hinges was pretty straightforward and with these hinges you can adjust how fast and slow they close.

It took a few tries of trimming the doors down the tiniest amount with our circular saw and then sanding the edges with a piece of sandpaper so they would close without rubbing the wood frame.

And Voila! Obviously, we aren’t quite done yet but we have definitely loved having room for our products in our bathroom. Next up, I’m either going to paint or stain the cabinets, caulk (I linked the one I use for all my projects) the inside to clean up the gaps, put some trim on the front of the doors and then around the edges to cover the cut lines, and we’ll have ourselves the look of a full built-in cabinet!

Would you do this in your home to use up wasted space and gain some more storage? I’m so happy I found this creative solution and think it could be totally customized for any space! Thanks so much for reading and drop any questions below!
xoxo,
