

Small Bathroom Transformation
Looking for some small bathroom inspo? Well, hopefully, I can enlighten you with what we’ve learned from our tricky little bathroom makeover!
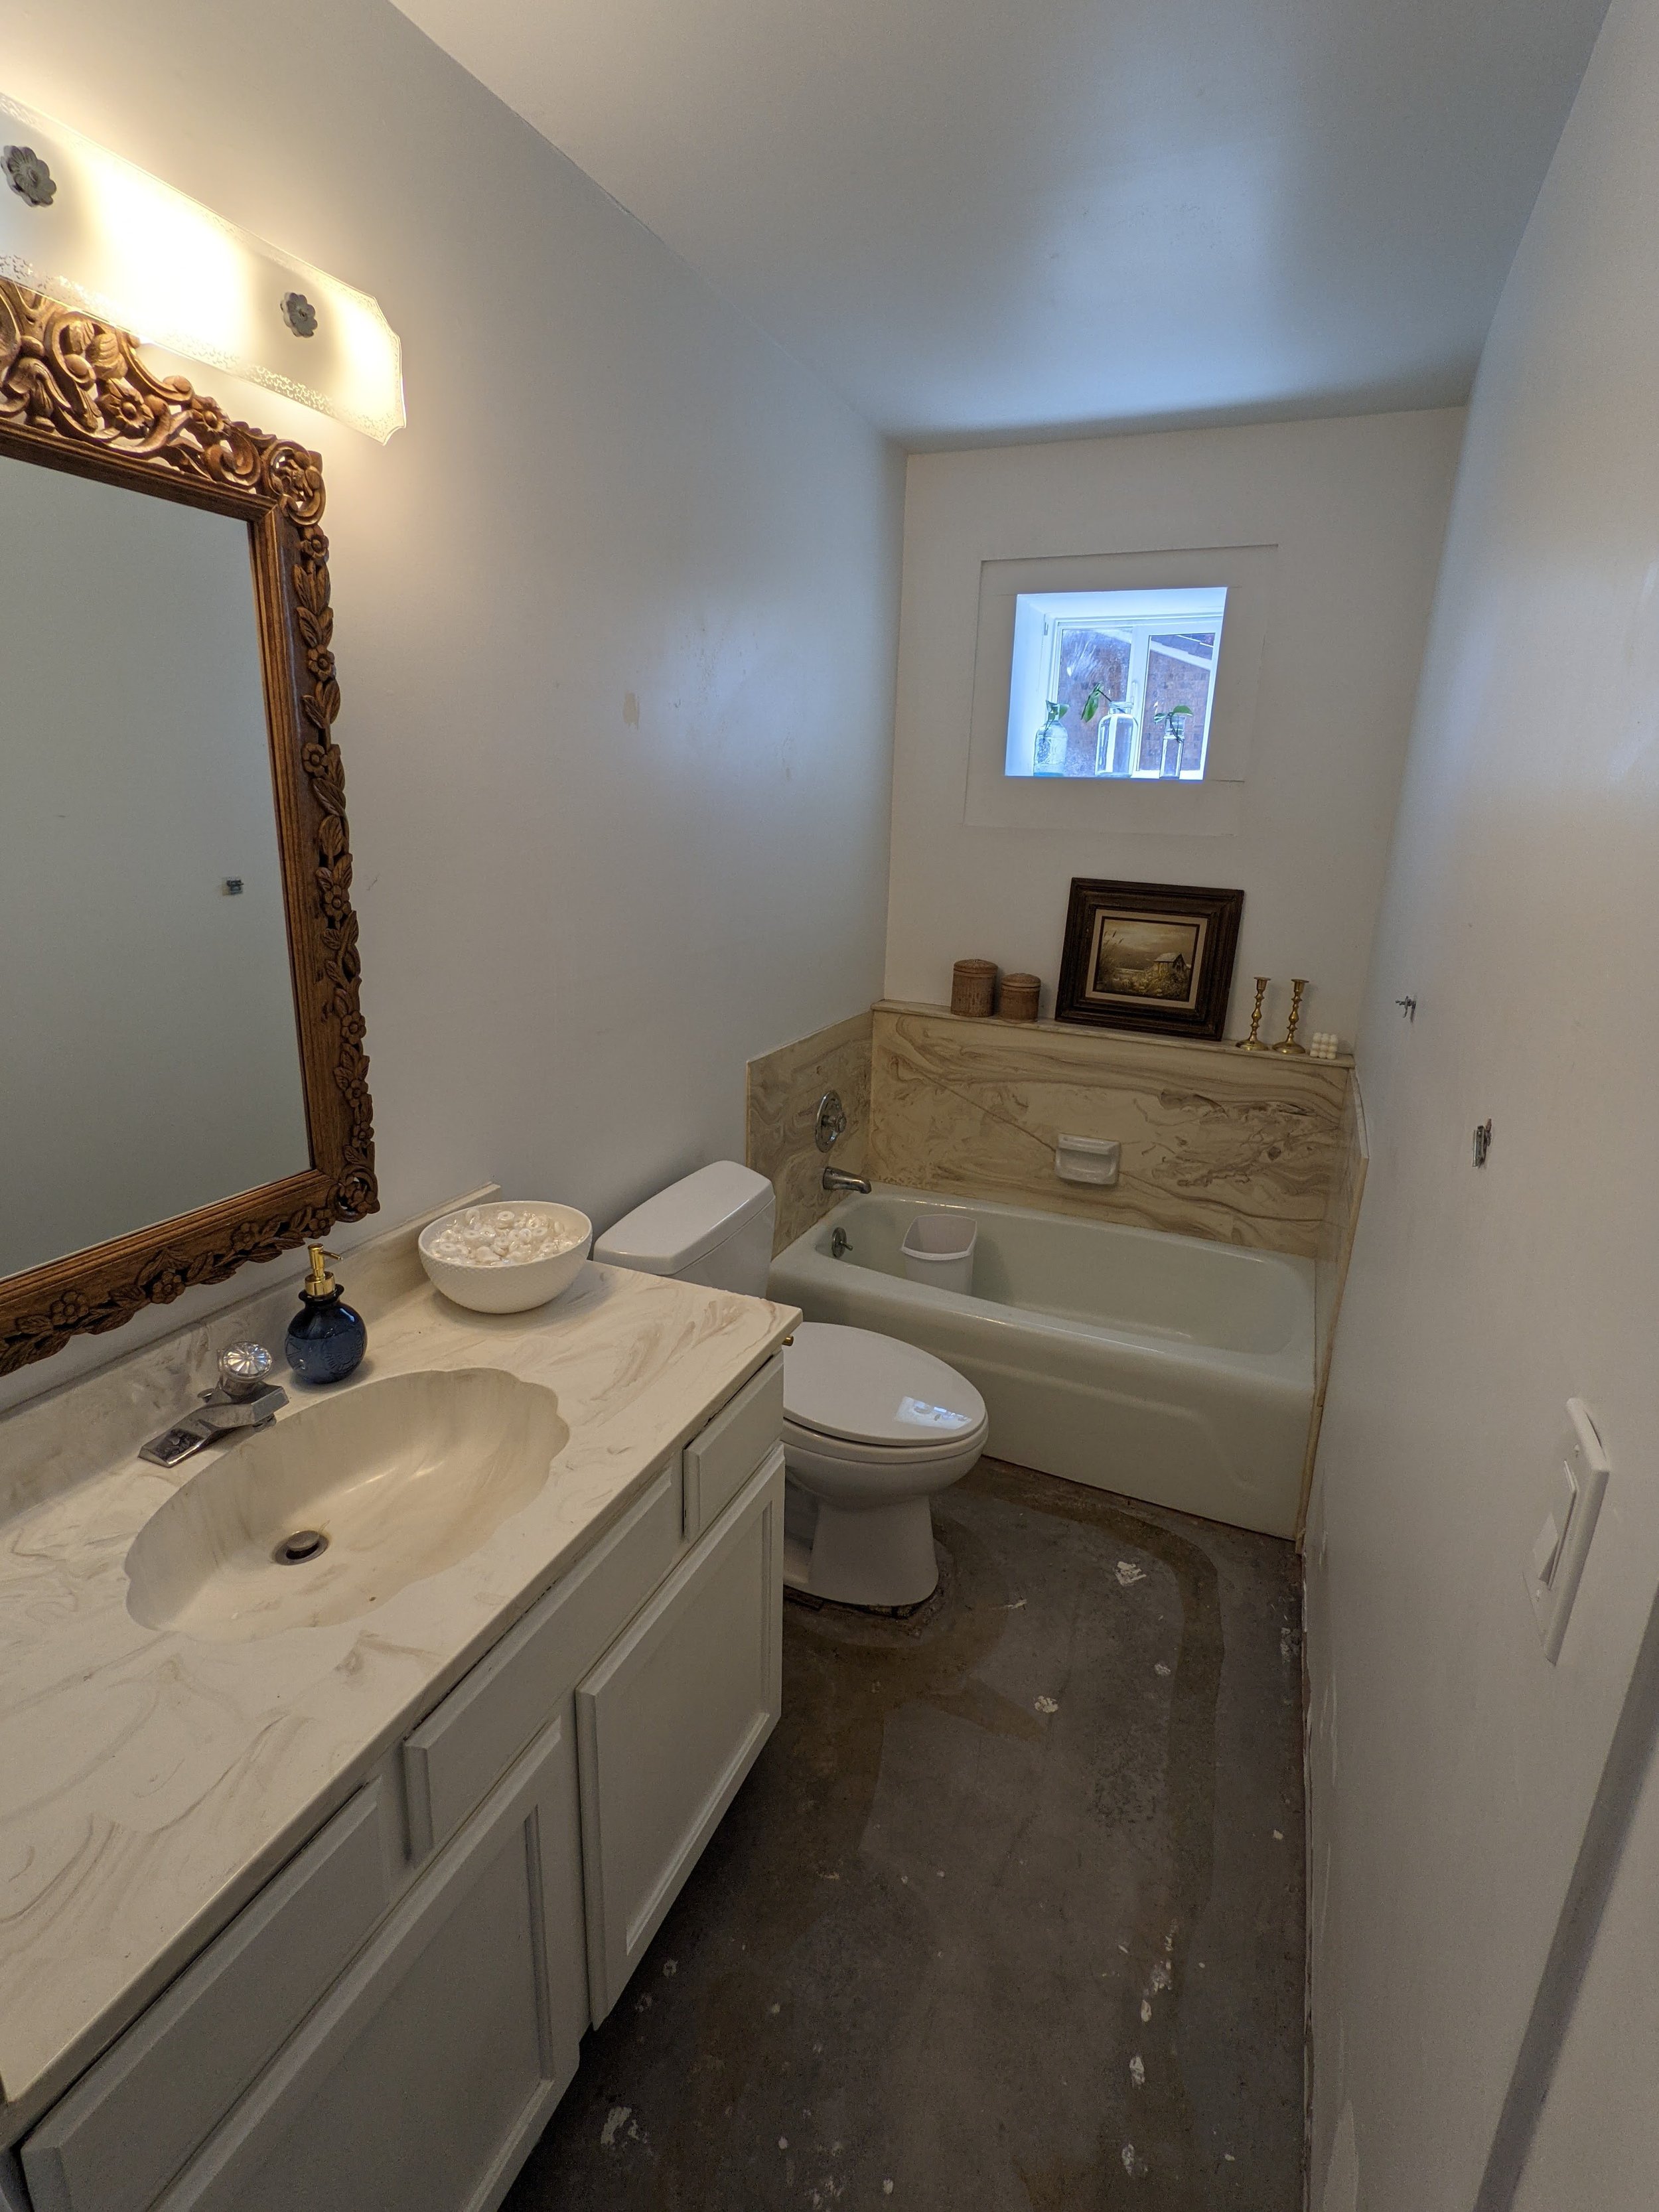
See the pic below? What catches your eye first is it the candy-striped carpet, the 51” wide child’s tub, or the swirly surround panels?
It’s all a rich tapestry haha We live in a “pass-through” town and have family or friends stay with us at least once a month and this bathroom is connected to the guest bedroom so it was high up on the list to be remodeled. I tried taking a bath in this tub once and it was memorable, to say the least…since our downstairs was built in the 1880’s we figured this cast iron tub was custom-made for this tiny space since they don’t make 51” tubs. The standard tub size is anywhere between 60-72” long. Ideally, I would love a tub in my house and that will hopefully come down the road but for now, I knew this bathroom needed a walk-in shower to accommodate guests and have a relaxing feel.

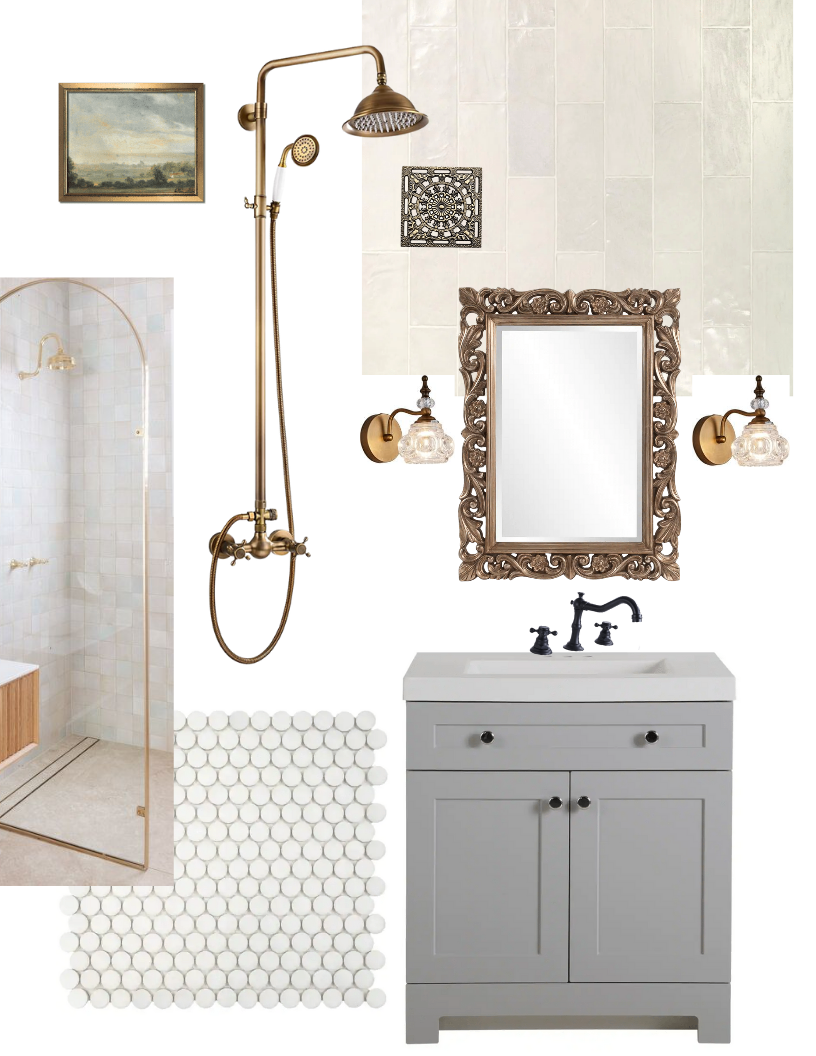
Thanks to good ol’ Pinterest I hunted for inspiration and ideas and created a mood board in canva, that’s my favorite way to design rooms and preview my ideas! I decided to have a neutral palette with the hardware and tiles but then add charm and color through wallpaper and paint.
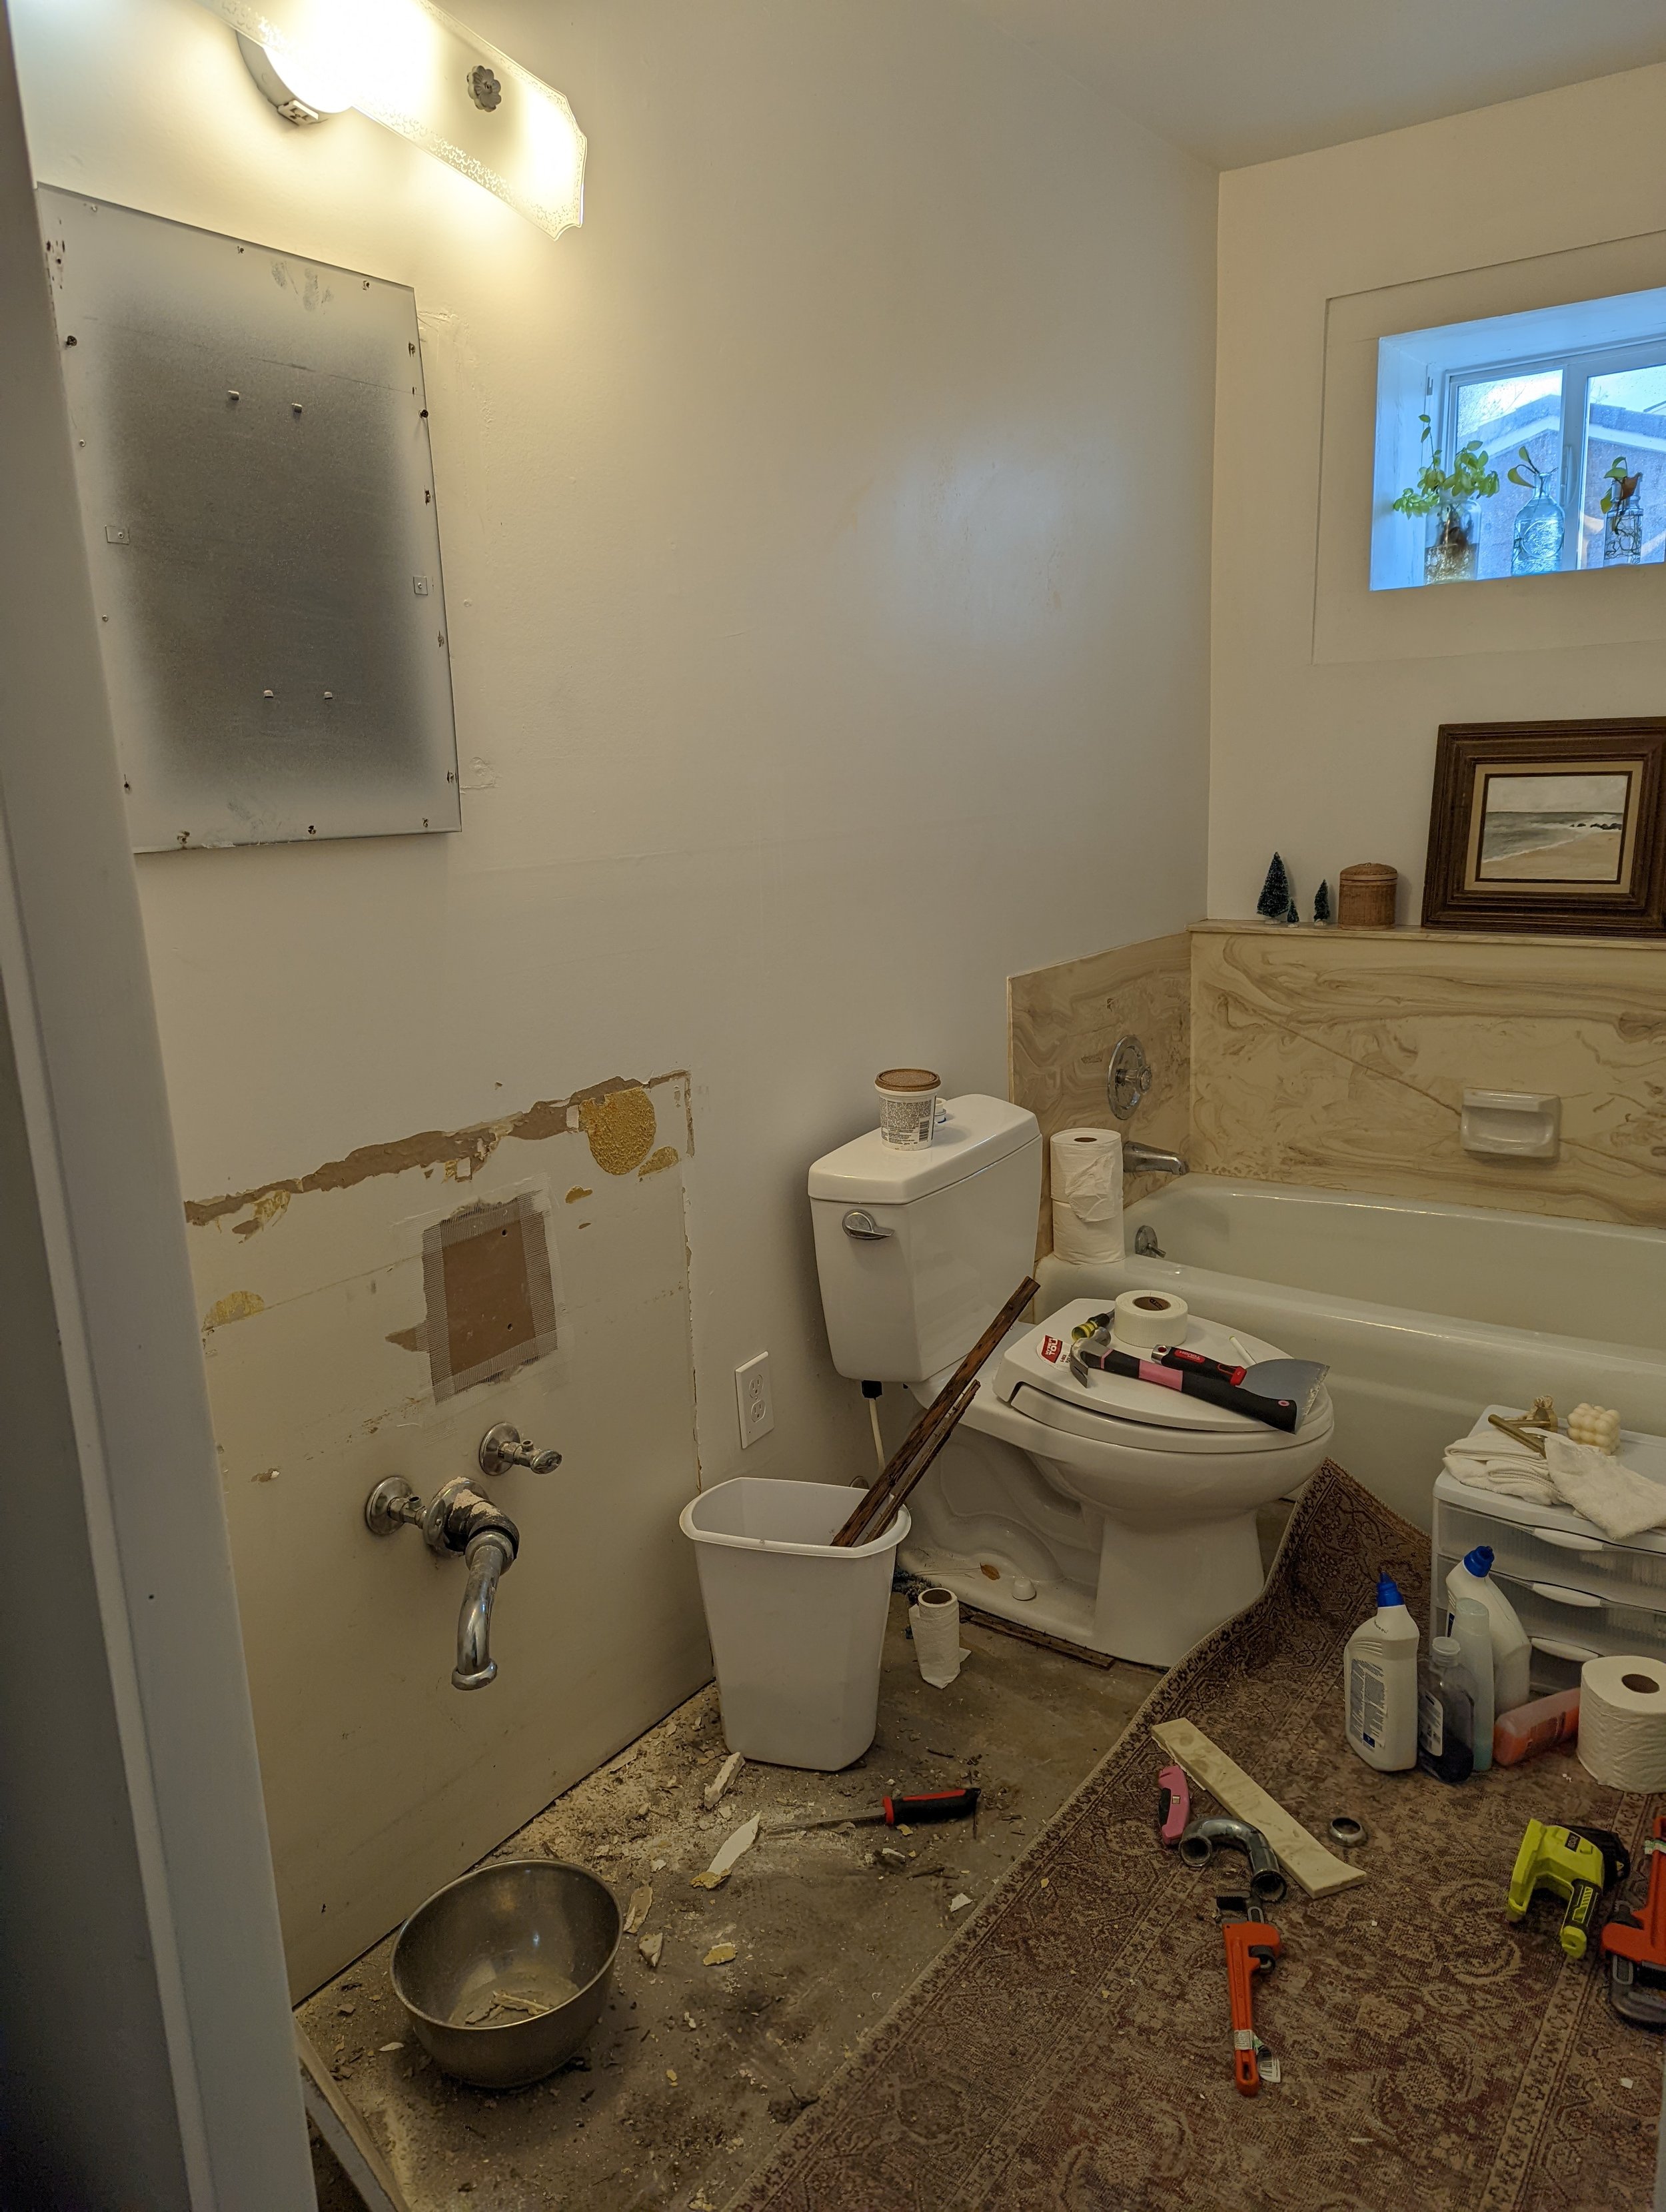
First, I started by ripping up that NASTY striped carpet and it was the greatest feeling to know it will never harm another bathroom again. Apparently, our home used to be a grainery which is why there are concrete floors so they could grind the grain and somehow it’s in great shape nice, and smooth!
Next step, remove and replace that old vanity! They glued it to the wall so that was a bit of a pain getting all that dried glue off the wall. Just a tip: Maybe don’t glue your vanity to the wall?
I will always recommend perusing your Facebook marketplace for anything! I scored this brand-new vanity for $100 and it retails for $350 I believe at Home Depot. There was nothing wrong with it and even though it had kind of a more modern style I knew it could be transformed with the faucet and hardware!

Already looking so much better, right? Also, I found the wooden carved mirror on FB marketplace for $40 and it’s one of my favorite things I’ve ever scored! It gives me such eclectic/anthropologie vibes! Here are some similar mirrors I found!

Okay now for getting down to business. We hired out the plumbing and the tiling to “our guy” who does all the projects we don’t quite feel confident in haha We aren’t afraid to try new things and love a good challenge, however, messing with plumbing from who knows when and adobe walls scared us silly so we thought it’d be worth handing that over to a professional.

Turns out….it’s a darn good thing we passed it off to a professional because there were some crazy hiccups with this renovation. For example, after the tub was cut in two and removed we found this massive pile of red dirt underneath, like what? This appeared to be the way they leveled the tub and there was SO much it filled up an entire garbage can.

Something I knew I wanted was a curbless shower entry and I really wanted to do tile on the bottom of the shower but it would have been a huge ordeal to get the floor to slope for the water to run down. This is something I kind of wish I would’ve pushed more for but it was recommended we get a custom shower pan without a lip so you don’t have to step up and over.
When I did my research the look of a curbless entry made the bathroom look bigger without a lip or step of separation but allowing the floor to look continuous.

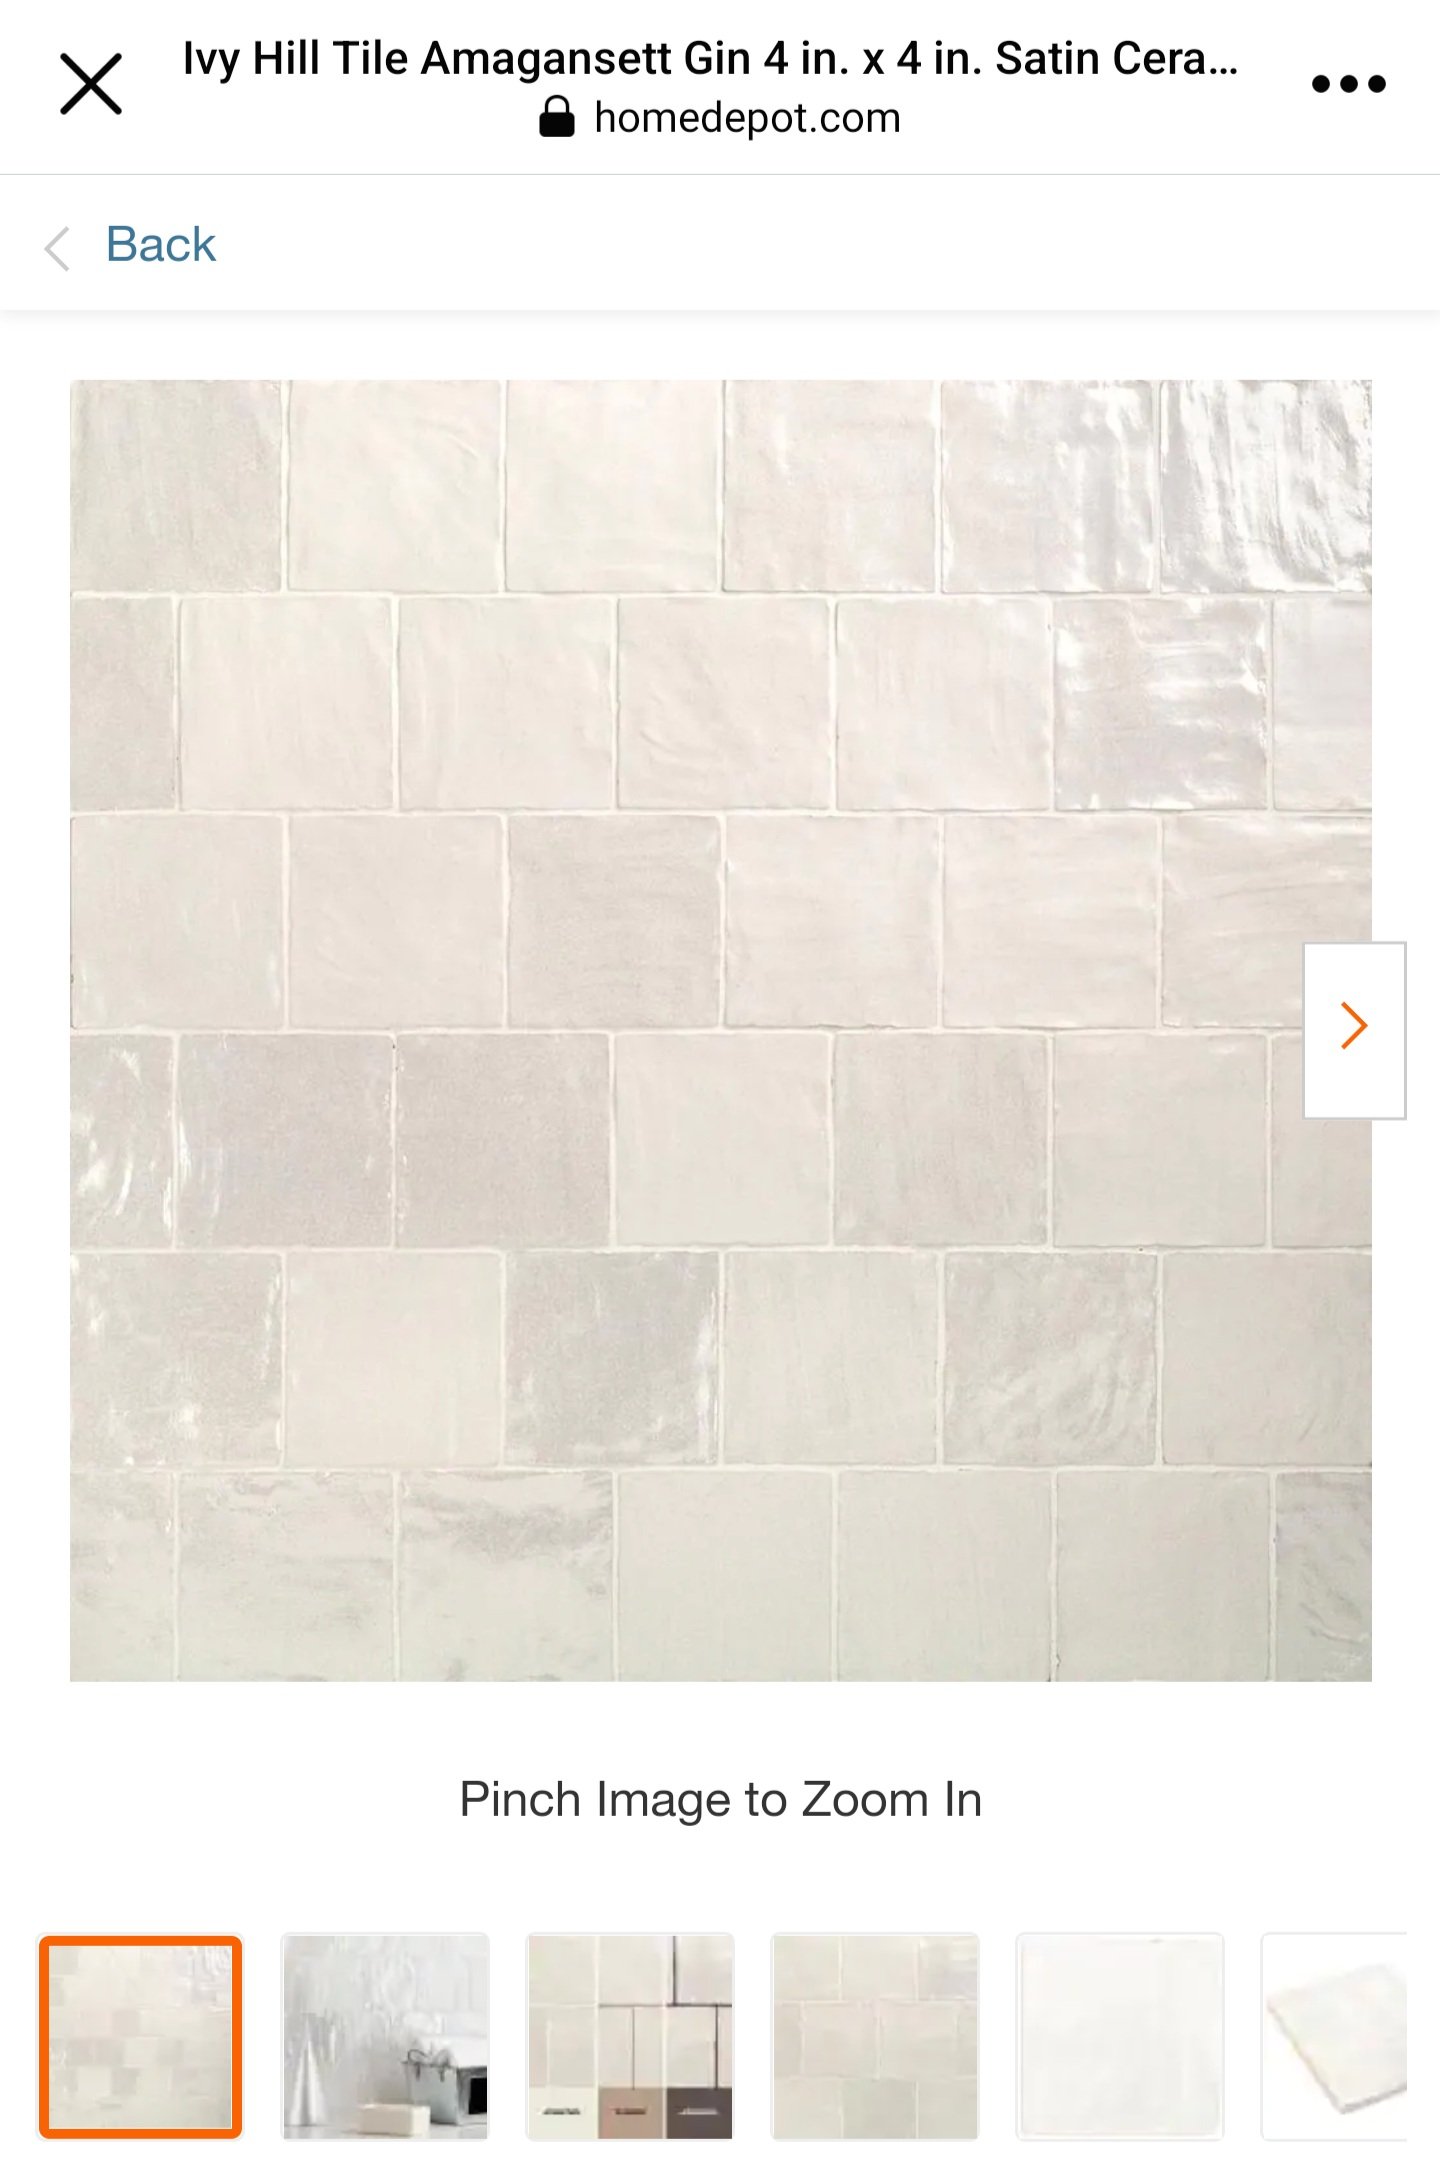
When it came to choosing the tile in the shower I ended up choosing this pearly square tile in the color “Gin White” from Home depot.
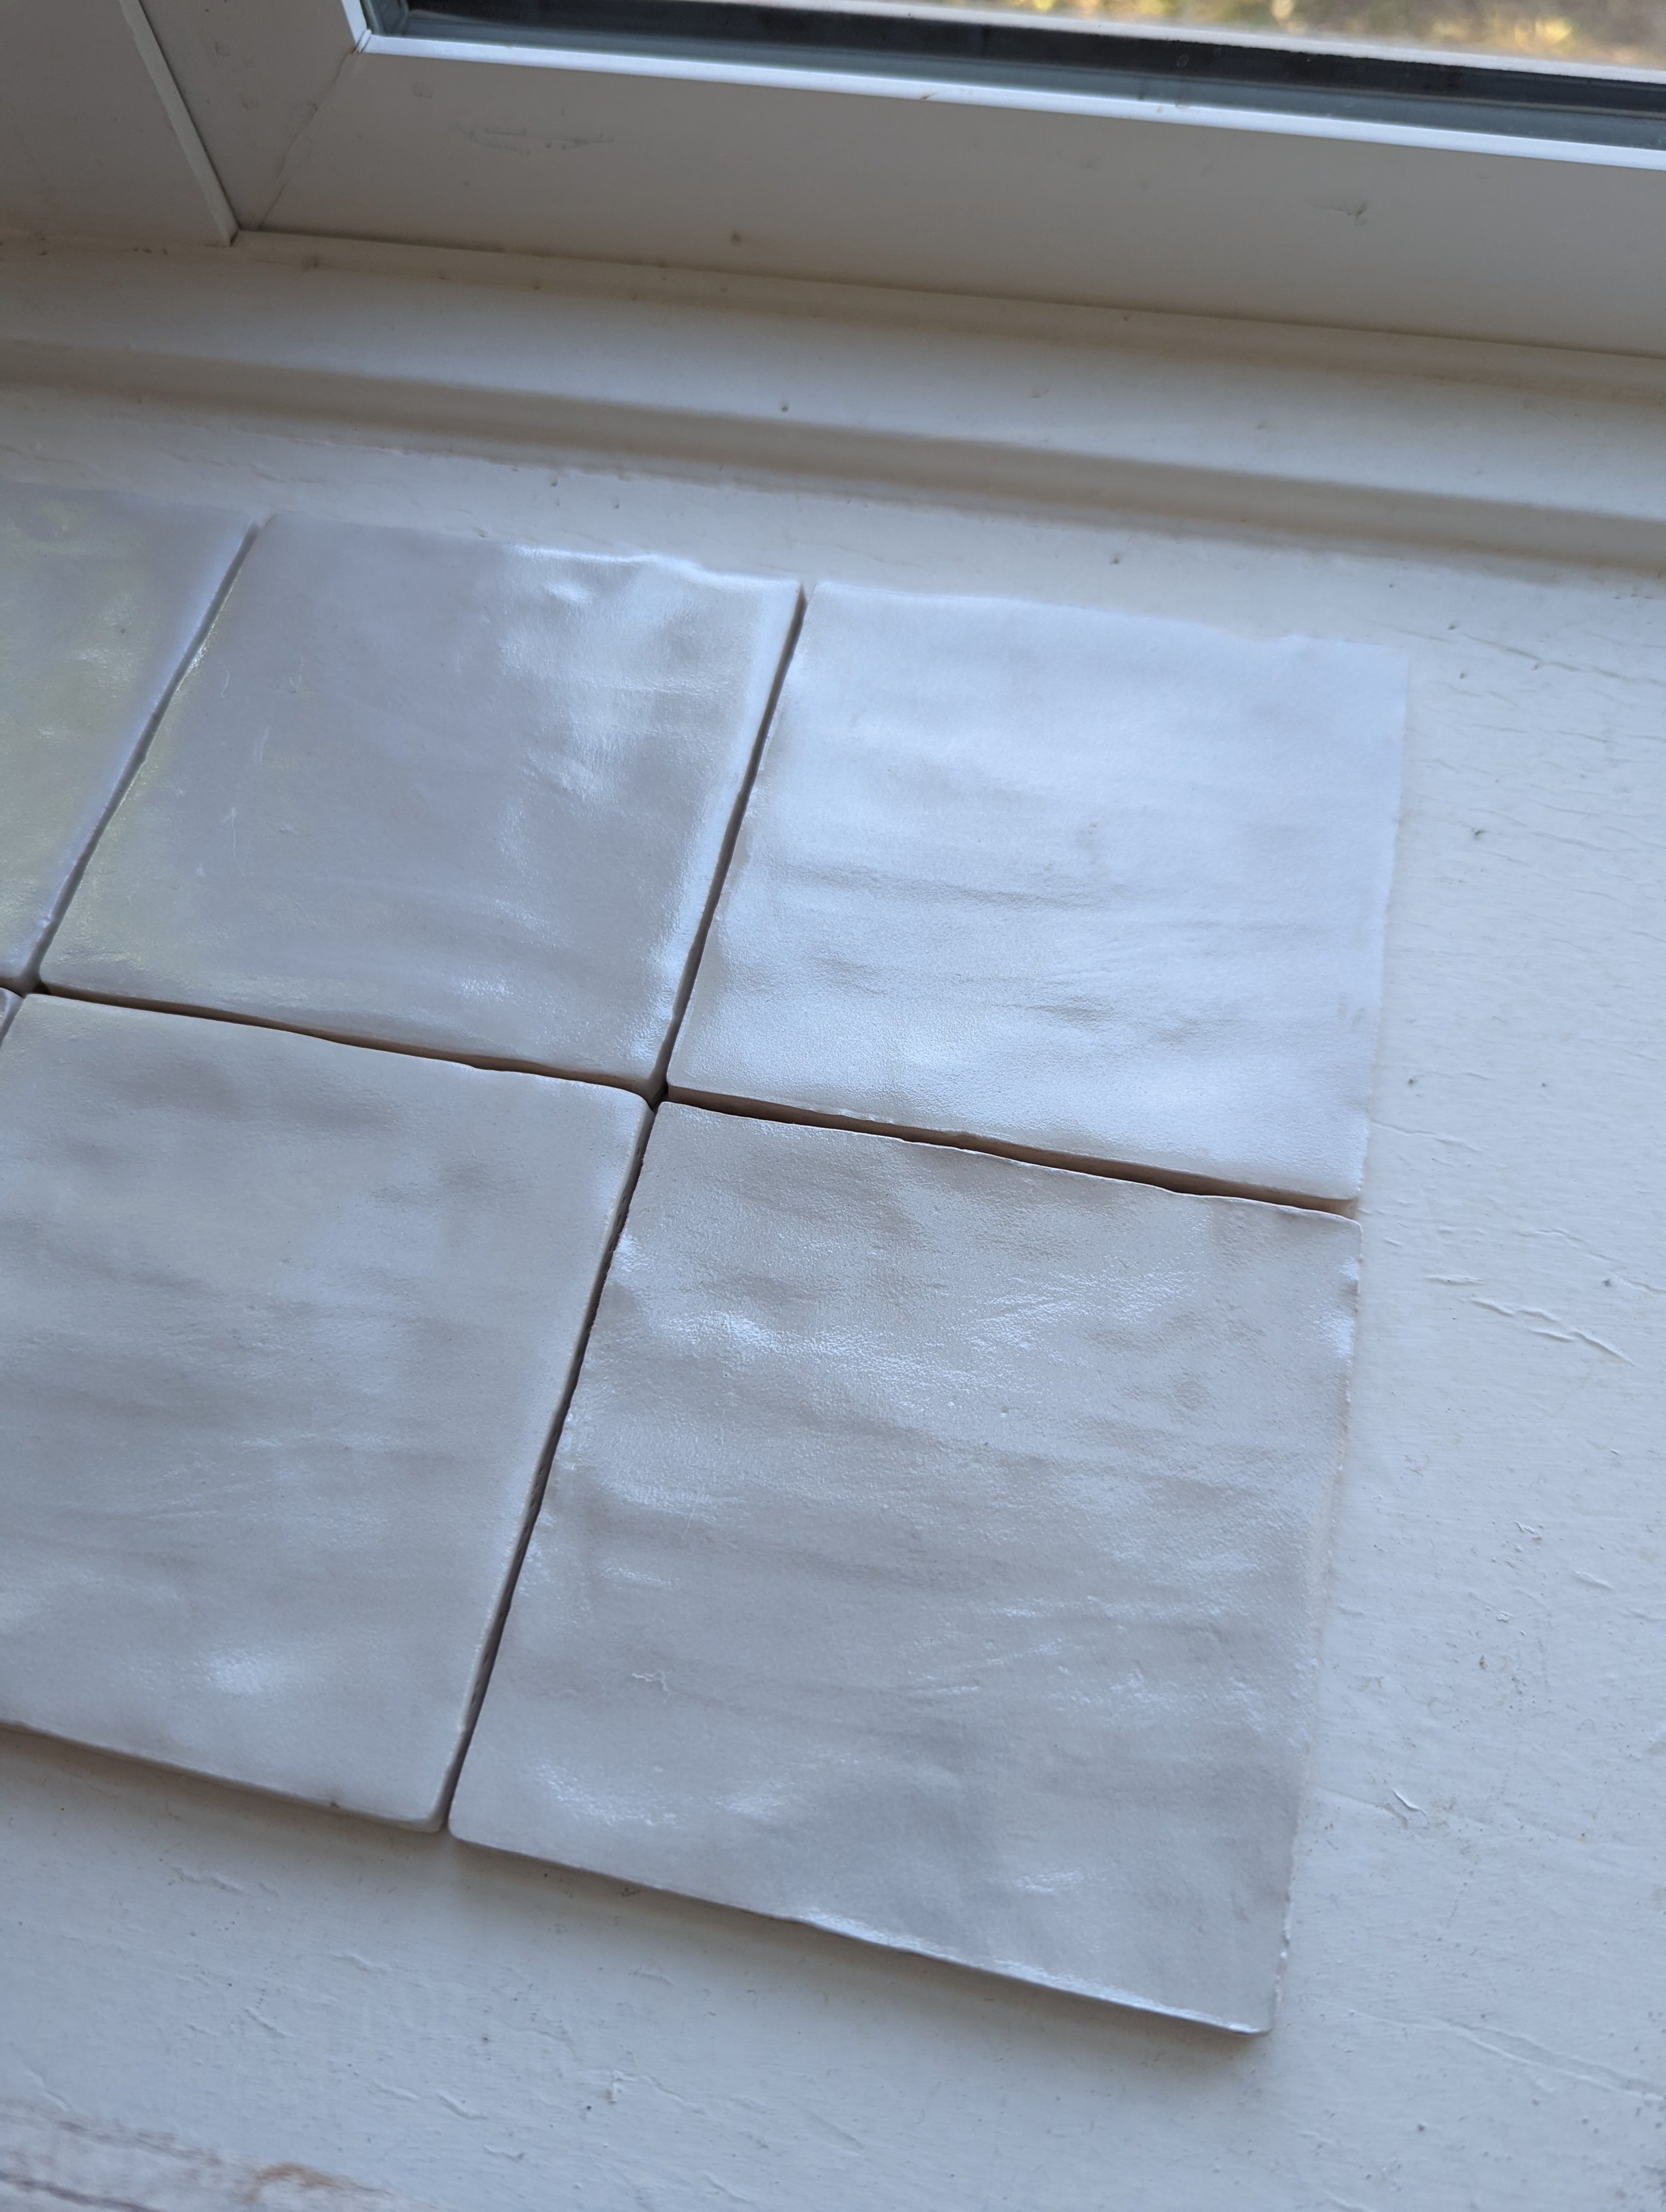
Here is how the tiling began and this is when I started getting really excited!


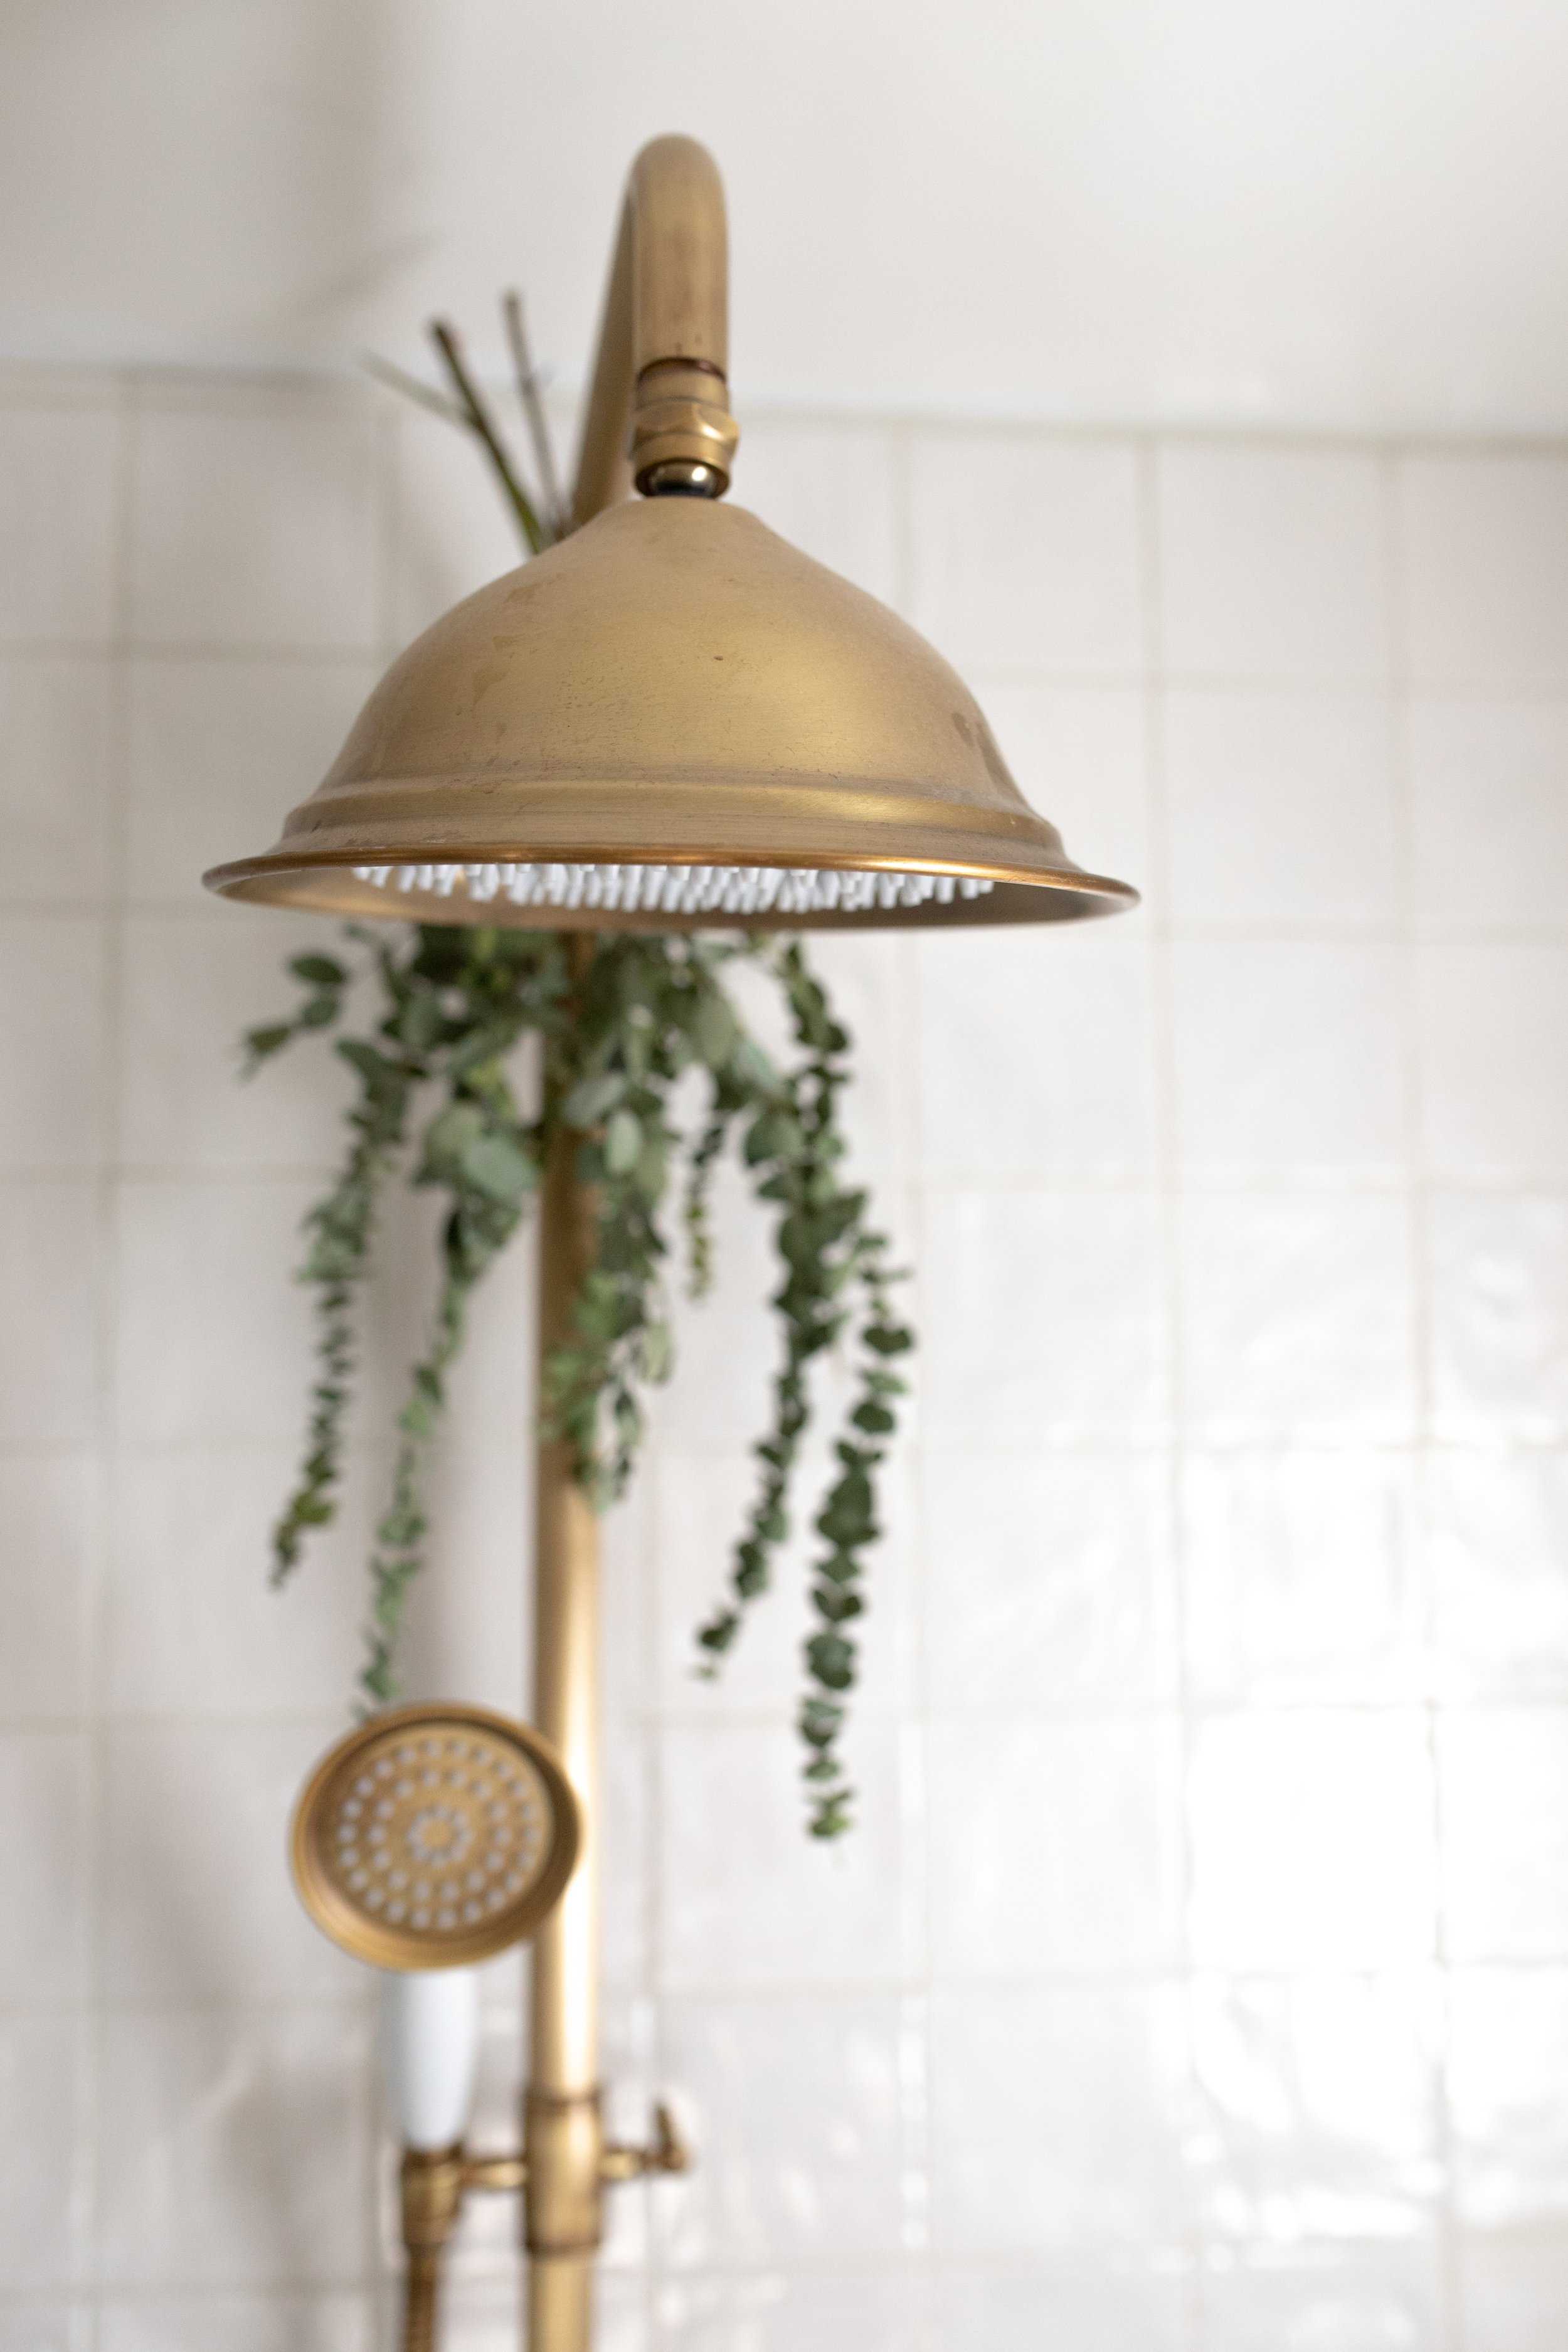
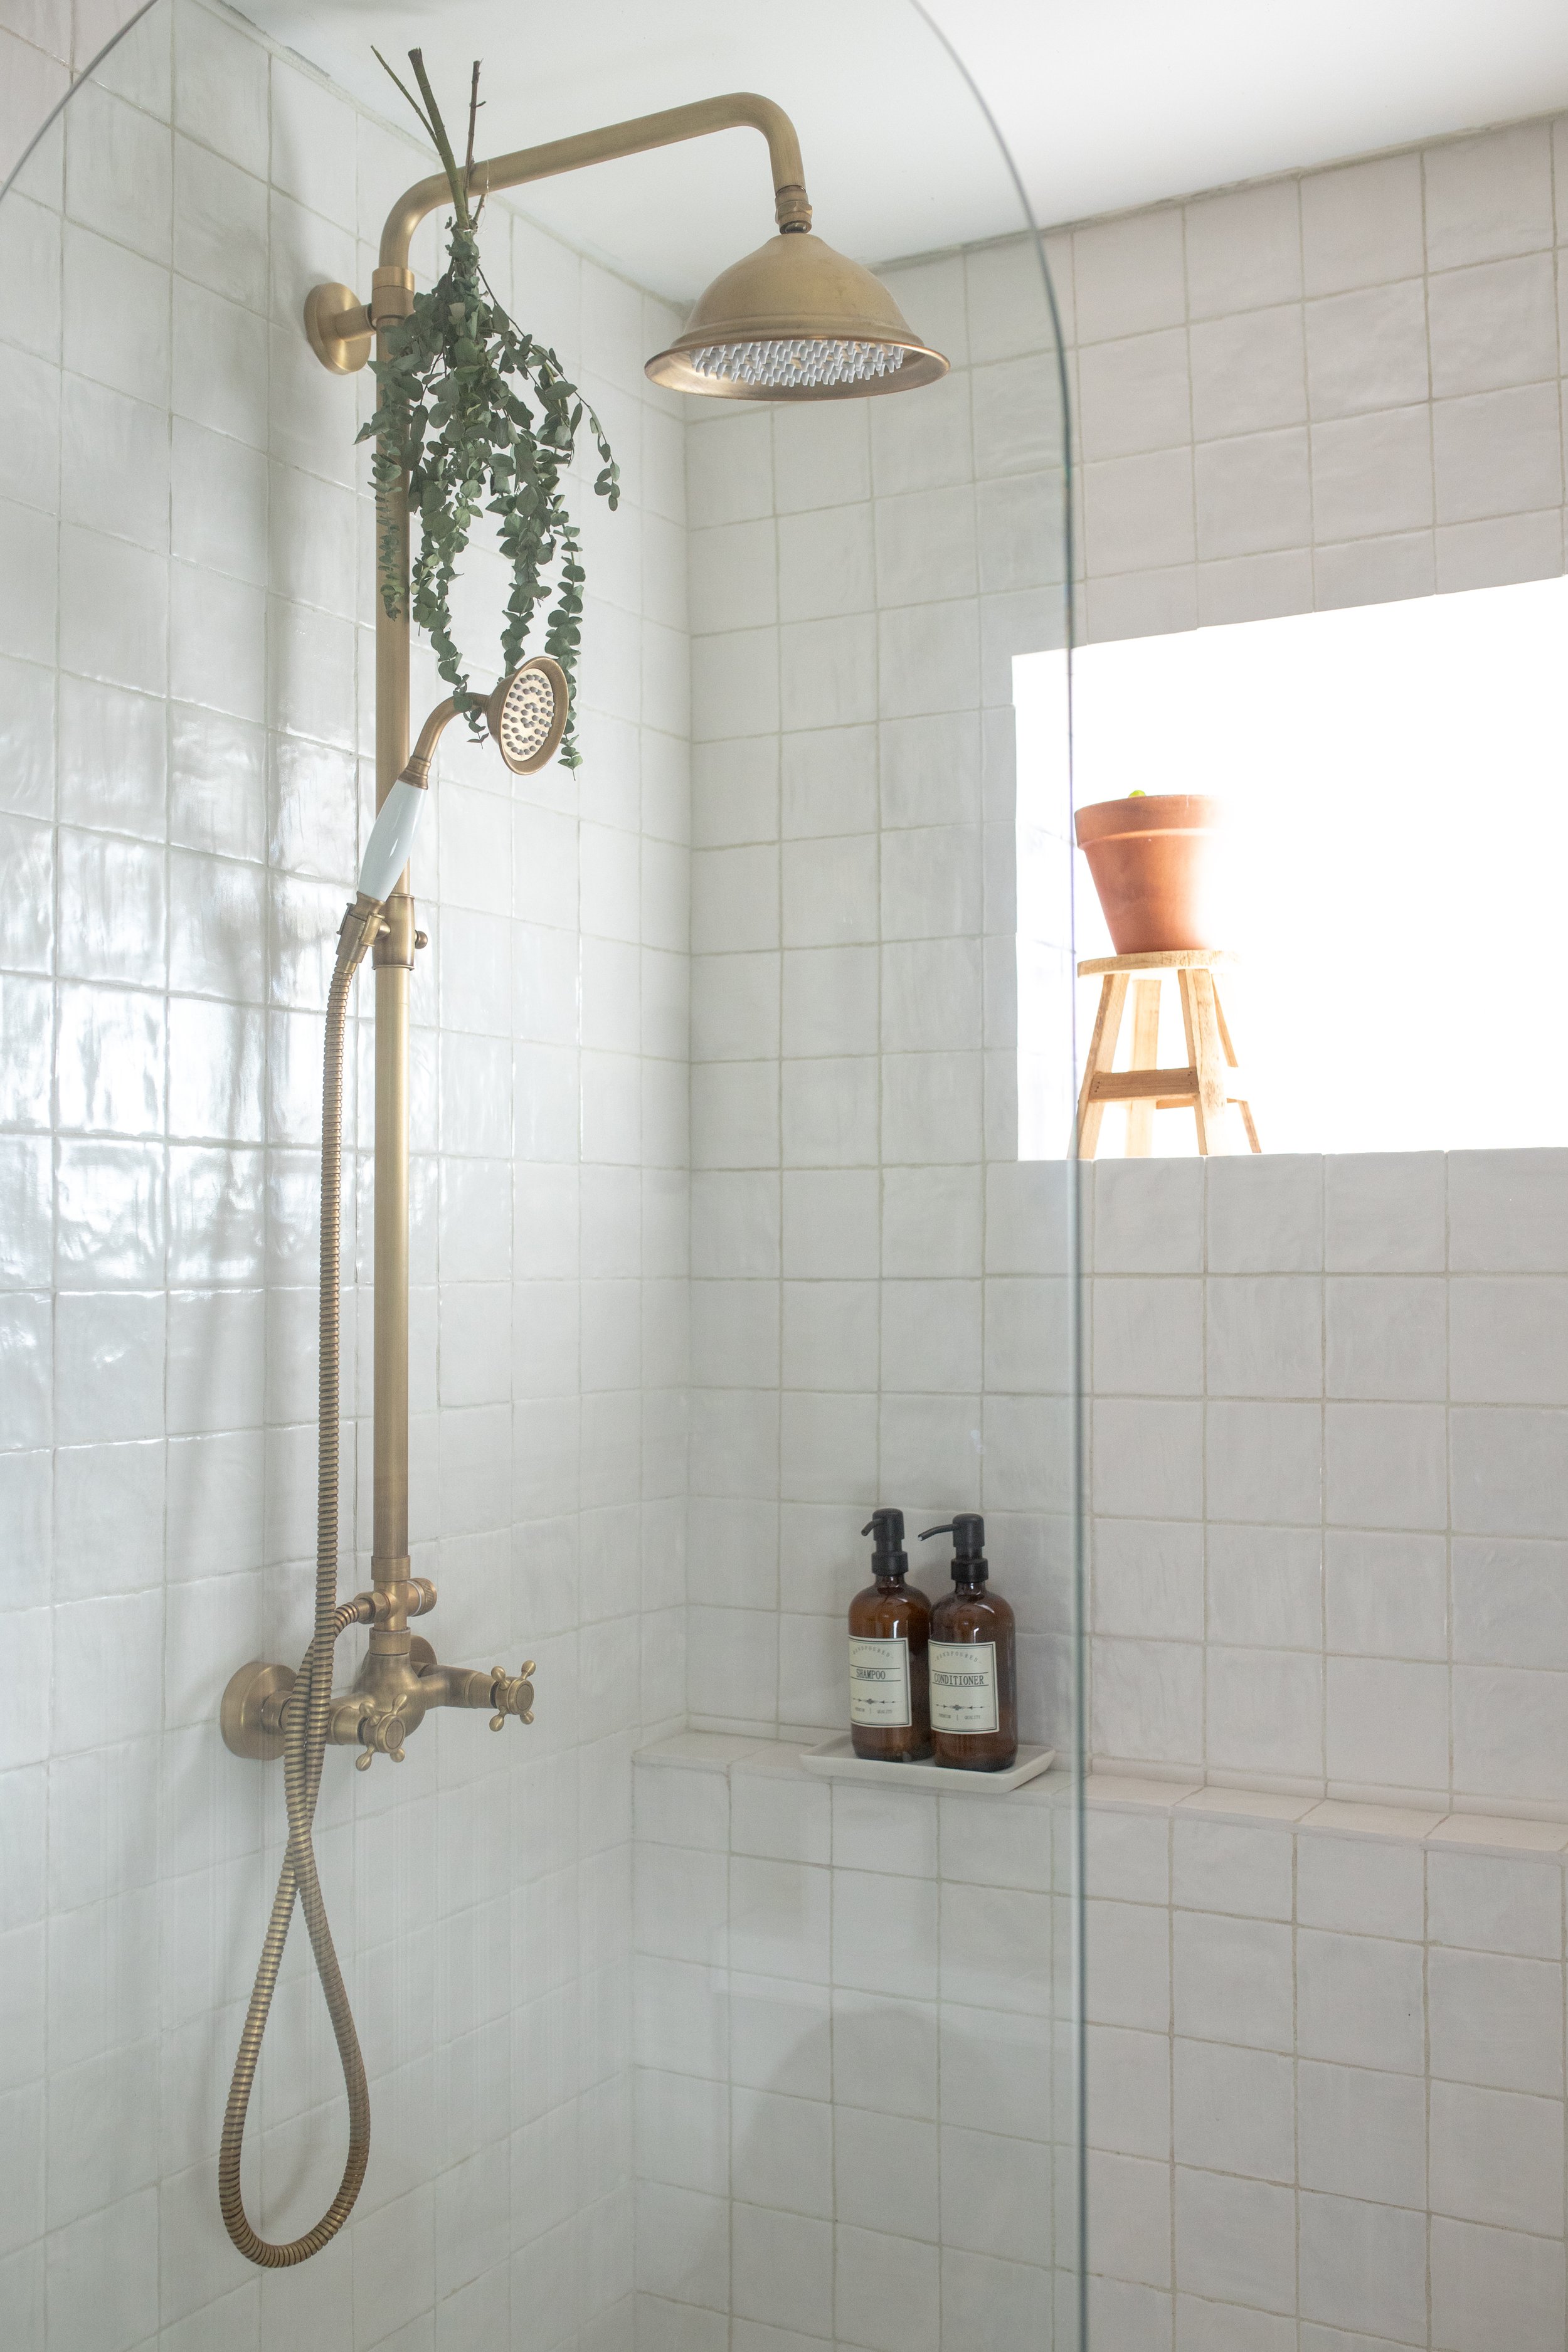
Isn’t she pretty?! We decided to have the inside of the window tiled also so that it would be waterproof from any splashes. That long “shelf” where the shampoo bottles are sitting was part of the design so there would be a long clean ledge for any products and even plants!

Can you say heyyy to this gorgeous arch glass panel and brass shower fixture? I wanted an arch to give different angles and I didn’t want a shower door that would open and close and hit the toilet. Our bathroom is small enough that I felt this design would work and it totally does! The only thing I wish I would’ve done differently is to go with my gut and have the glass panel be another inch or two wider to prevent more splashing.

Now time for some board and batten! I got 4 of these panels from Home Depot and put some small molding on along the top. I could’ve gone with a small shelf but it would kind of jet out into prime walking space so I decided against it.

Okay so just a reminder: Here is the listing photo for this bathroom and how it looked when we moved in…

And here’s how things look now with our lovely relaxing shower! Every time I take a shower in here I feel like I’m in a spa haha I love it so so much and can’t believe I made a design that came to life (with tweeks of course) haha


I have lots more plans for this bathroom like adding wallpaper, painting the board and batten/ ceiling an accent color, finishing the flooring, painting the vanity, and adding storage! Don’t worry I’ll take you along every step of the way!
Thanks for reading!
xoxo,
